New! Restrict Access to WordPress Blocks with Restrict Content Pro + Kadence Blocks Integration
Good news! Restrict Content Pro now integrates seamlessly with Kadence Blocks. If you haven’t heard of it already, Kadence Blocks is one of the most robust plugins for adding a powerful library of WordPress blocks that add page-building capabilities within the native WordPress block editor.
The best part? The Kadence Blocks plugin is totally free and works with any theme.
With this new integration, if you’re running both the Restrict Content Pro and Kadence Blocks plugins, you can now restrict access to content contained within any WordPress block without using a shortcode. Any WordPress block is now open to content restriction with the Restrict Content plugin using the free version of Kadence Blocks and its powerful Row Layout block.
What is the Kadence Blocks plugin?
The FREE Kadence Blocks plugin was created to be an all-in-one toolkit that gives the WordPress block editor the capability of creating unique content that’s typically only possible by using page builder plugins. Kadence Blocks offers a library of robust WordPress blocks, including a pre-built library of designs, that will allow you to expand your ability to build flexible, unique, and dynamic web pages.
The Kadence Blocks plugin works with any theme, as long as you’re using the native WordPress block editor.

All Kadence Blocks come with settings and controls the default WordPress blocks don’t offer, along with a whole suite of WordPress blocks you won’t find in the default library, including:
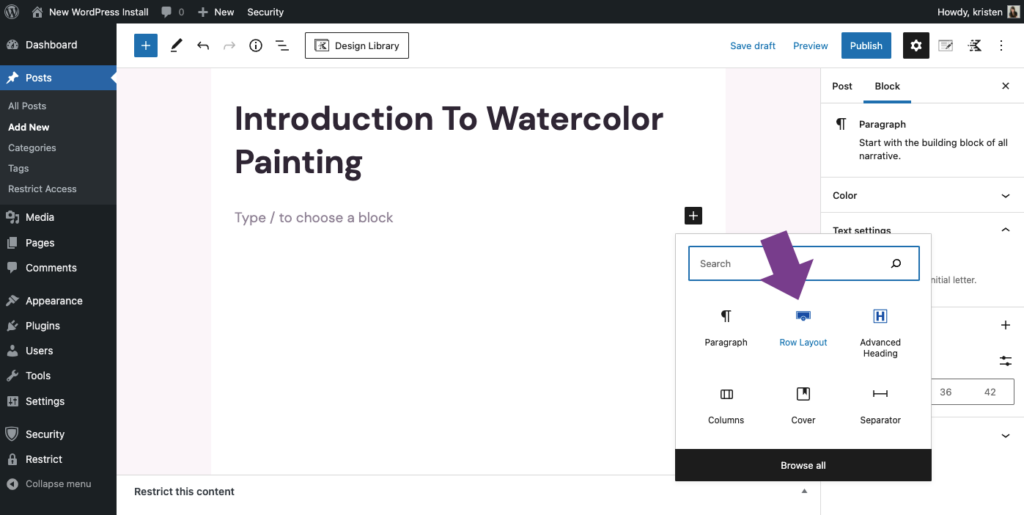
- Row/Layout Block – The “Row / Layout” block is the foundation to bringing a more advanced editing experience and options into the WordPress block editor. Think of this as your base container when you need any type of special layout or content. When you add the block into the editor, you are immediately given options to choose which layout you want to use, along with new content restriction settings by membership level.
- Posts (Grid) – Display a clean grid of posts anywhere on your site, great for your home page where you want to tease your blog.
- Table of Contents – The Table of Contents Block is a great way to provide navigation for your long post content. You can choose which heading levels are displayed, and provide a smooth scroll to anchor experience.
- Tabs – The Tabs Block is highly customizable with unique tab title settings for spacing, color, icons, and text. You can set up vertical or horizontal tabs, plus there are options to switch to an accordion setup for mobile. Each tab content is an empty canvas able to contain any other block within it.
- Info Box – The Info Box block provides a clickable box that contains an image or icon and optionally containing a title, description and learn more text. You can style static and hover colors change fonts, borders, even show a box-shadow.
- Countdown – The countdown block allows you to post a banner with a timer counting down the time. Use it to give a sense of urgency to your marketing sales or to display time left until an event.
- Form – Kadence form block allows you to easily create a contact or marketing form and style it within the block editor.
- Advanced Gallery – Create stunning WordPress photo galleries, carousels, and sliders! Enjoy four different optional caption locations, each with options to style font, background, etc.
- New! Lottie Block – Add high quality and low-bandwidth animations to your website with Lottie animations.
- Accordion – Create beautiful accordions. Each pane is able to contain any other block, customize title styles, content background and borders. Includes built-in FAQ Schema for better SEO.
- Testimonials – Create confidence in your brand or product by showing off beautiful unique testimonials. You can add as a carousel or a grid. There are four built-in preset styles to choose from, you can then edit colors, fonts, size, border, shadow, etc. Extremely versatile and easy to use.
- Advanced Buttons – A powerful way to create buttons in Gutenberg. You can have multiple buttons per line and easily style text size, padding, border radius, border width, color, background, border and hover styles for the color, background, and border.
- Icon List – Create compelling lists that really attract viewers by using custom icons instead of a default bullet. Choose from over 1500+ SVG icons to add to your list and style the list using custom colors, fonts, and sizes.
- Spacer/Divider – This simple block gives you optional divider options as well as letting you drag the height where you want. With the divider, you can set color, size, and width. You can also assign custom heights for different screen sizes so your design can be perfectly responsive.
- Icon – Choose from over 1500+ SVG icons to add into your page. You can add multiple icons per row. Style the color, background, border and you can even add a link. All icons are added as an SVG so you only load the icons you choose to add to the page. No icon fonts used.
- Advanced Heading (Text) – Transform your headings to Advanced Headings and customize the font family (even google fonts), color, size, style. Also includes paragraph text.
- Advanced Image – Add images to your posts and pages with animations on scroll, shadows, masks, and filters, right in the block editor.
- Count Up – Add animations that count up or count down to specific values.
How to Restrict Access to Content with Kadence Blocks
One of the best parts about Kadence Blocks is that all blocks have visibility controls, so you can hide block settings from certain user roles. With this new integration with the Restrict Content Pro plugin, visibility settings now include Restrict Content Pro Membership Levels and Access Levels.
Restricting content with Kadence Blocks and Restrict Content is easy. To get started, you’ll need to have both plugins installed and active on your site. Download the free version of Kadence Blocks and Restrict Content, or grab a Restrict Content Pro or Kadence Blocks Pro to add even more features to your site.
Step 1: Setting Up Membership Levels (and Access Levels)
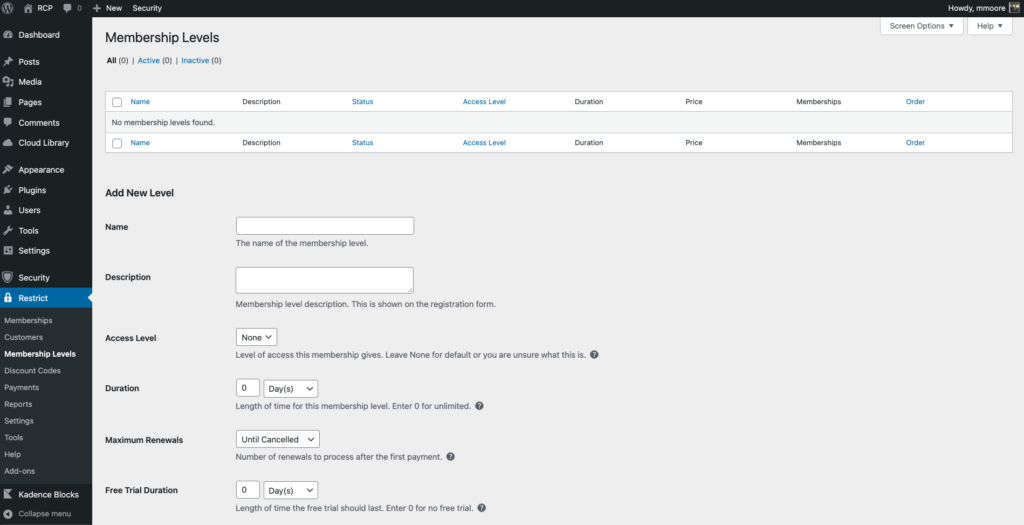
- 1. Configure your membership levels in the Restrict Content Pro or Restrict Content (free) plugin. Membership levels are added from Restict > Membership Levels. Membership level options are displayed on the registration page and customers can select the one they wish to purchase. Each membership level can be given a price, an optional signup fee (one-time amount), an optional trial period, a frequency and period, and a user role that will be assigned to members when they register.
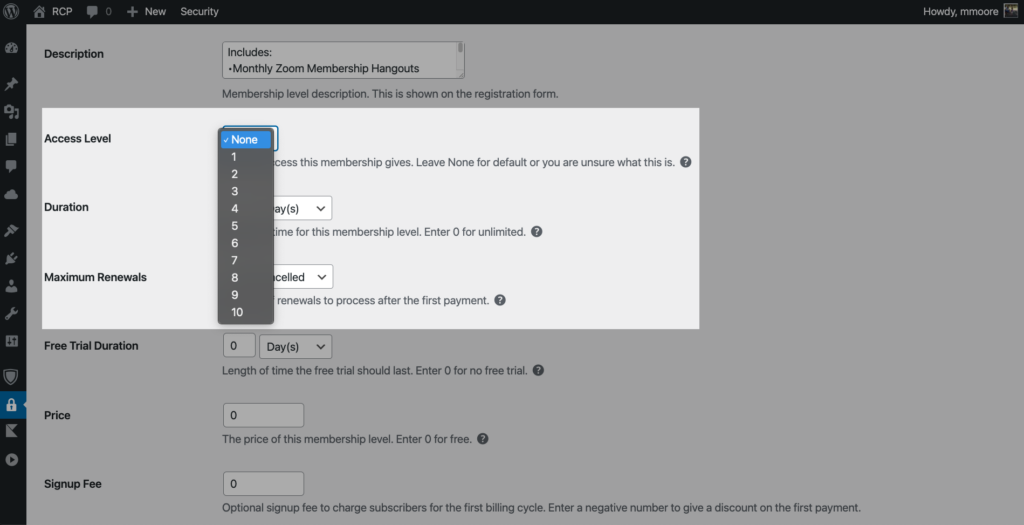
- 2. Configure your Access level settings (optional). Kadence Blocks can also utilize Restrict Content Pro’s Access Levels for content restriction. Restrict Content Pro’s Access Levels are one of the elements of membership levels that you can configure when setting up the membership levels for your site. Access levels are a tiered system, meaning any account with an access level can view any and all content that is assigned to an access level of equal or lower value. Each membership level has the option to set an access level between 1 and 10, or none.
Step 2: Restricting Content Visibility with the Row Layout Block
When restricting the visibility of certain content, you’ll want to use the Kadence Row Layout block. The Row Layout block is an easy way to group content together, and this is where you will find the Restrict Content settings by block.
- While editing a post or page, add a Kadence Row Layout block. Any block can be added within the Row Layout block, so think of this as your base container for any block you want to restrict.
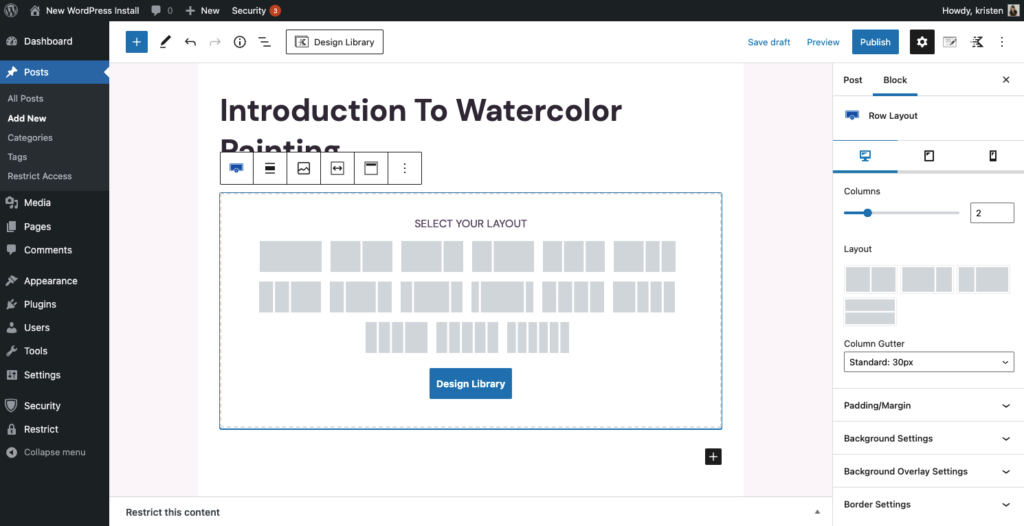
- The Row Layout block gives you a ton of options for selecting a layout, including multiple column options. Also note all the Block settings to the right. Start adding your content inside the Row Layout block.
- To configure content restriction to the Row Layout block, ensure you’ve got the Row Layout selected, click the List View at the top of the page. Then, select Row Layout.
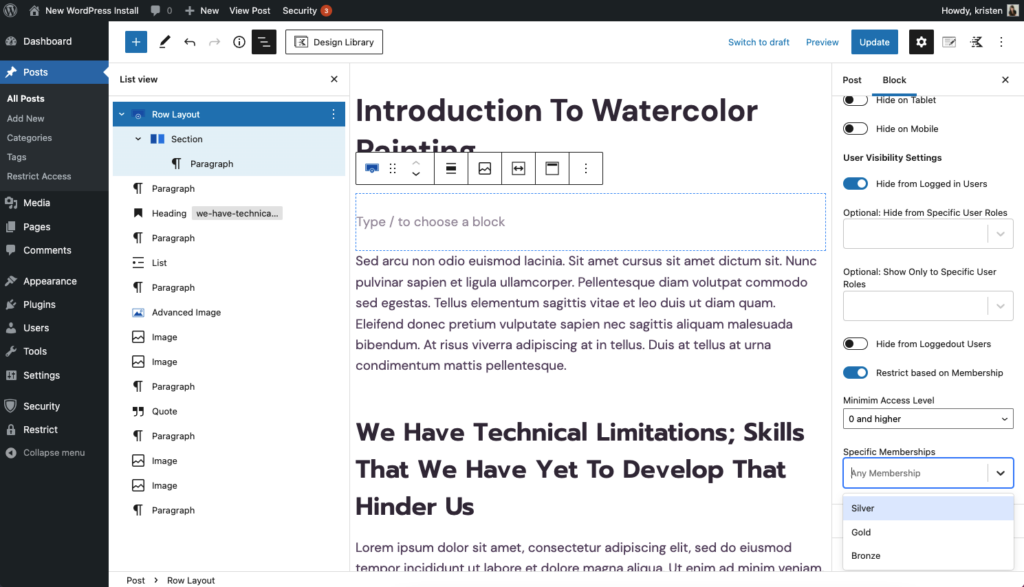
- In the right sidebar where you find the block settings, choose Visibility Settings. Scroll down and there, you will find a number of settings, including Restrict based on Membership. Toggle this setting on.
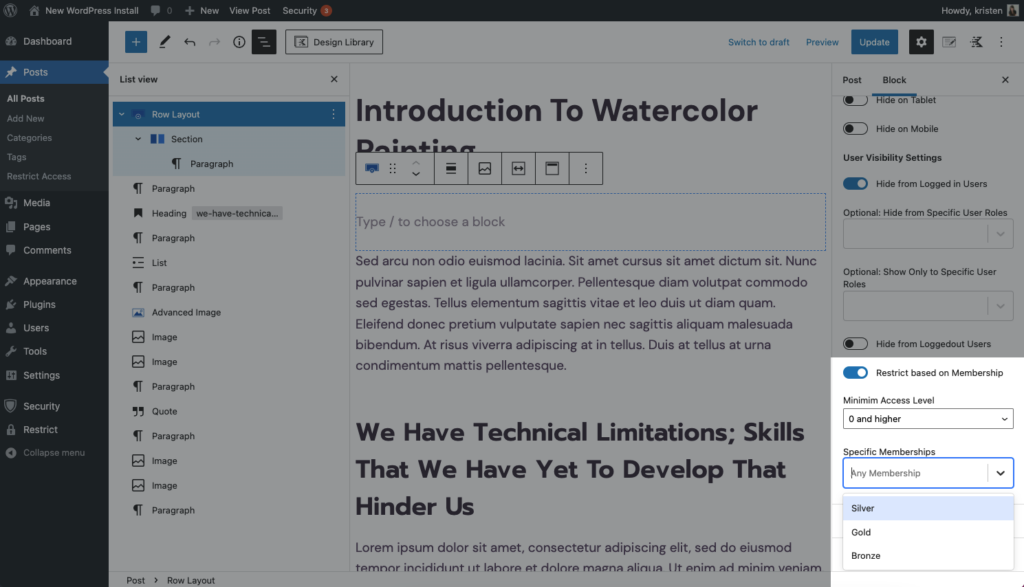
- You’ll now see options that pull from your Restrict Content Pro membership levels and access levels to restrict the Row on membership. Select specific memberships or your access levels, depending on who you want to see the content.
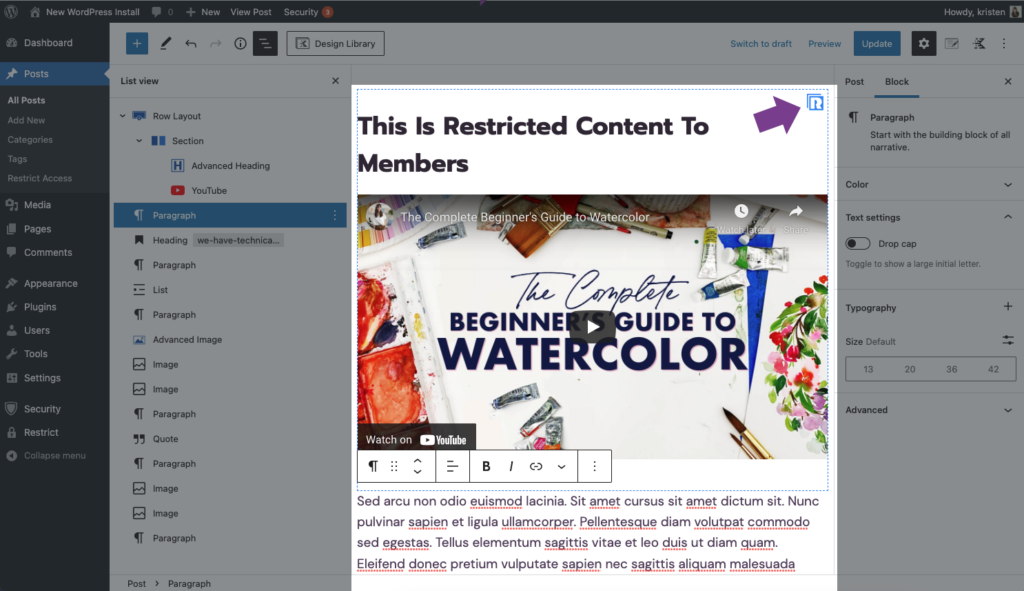
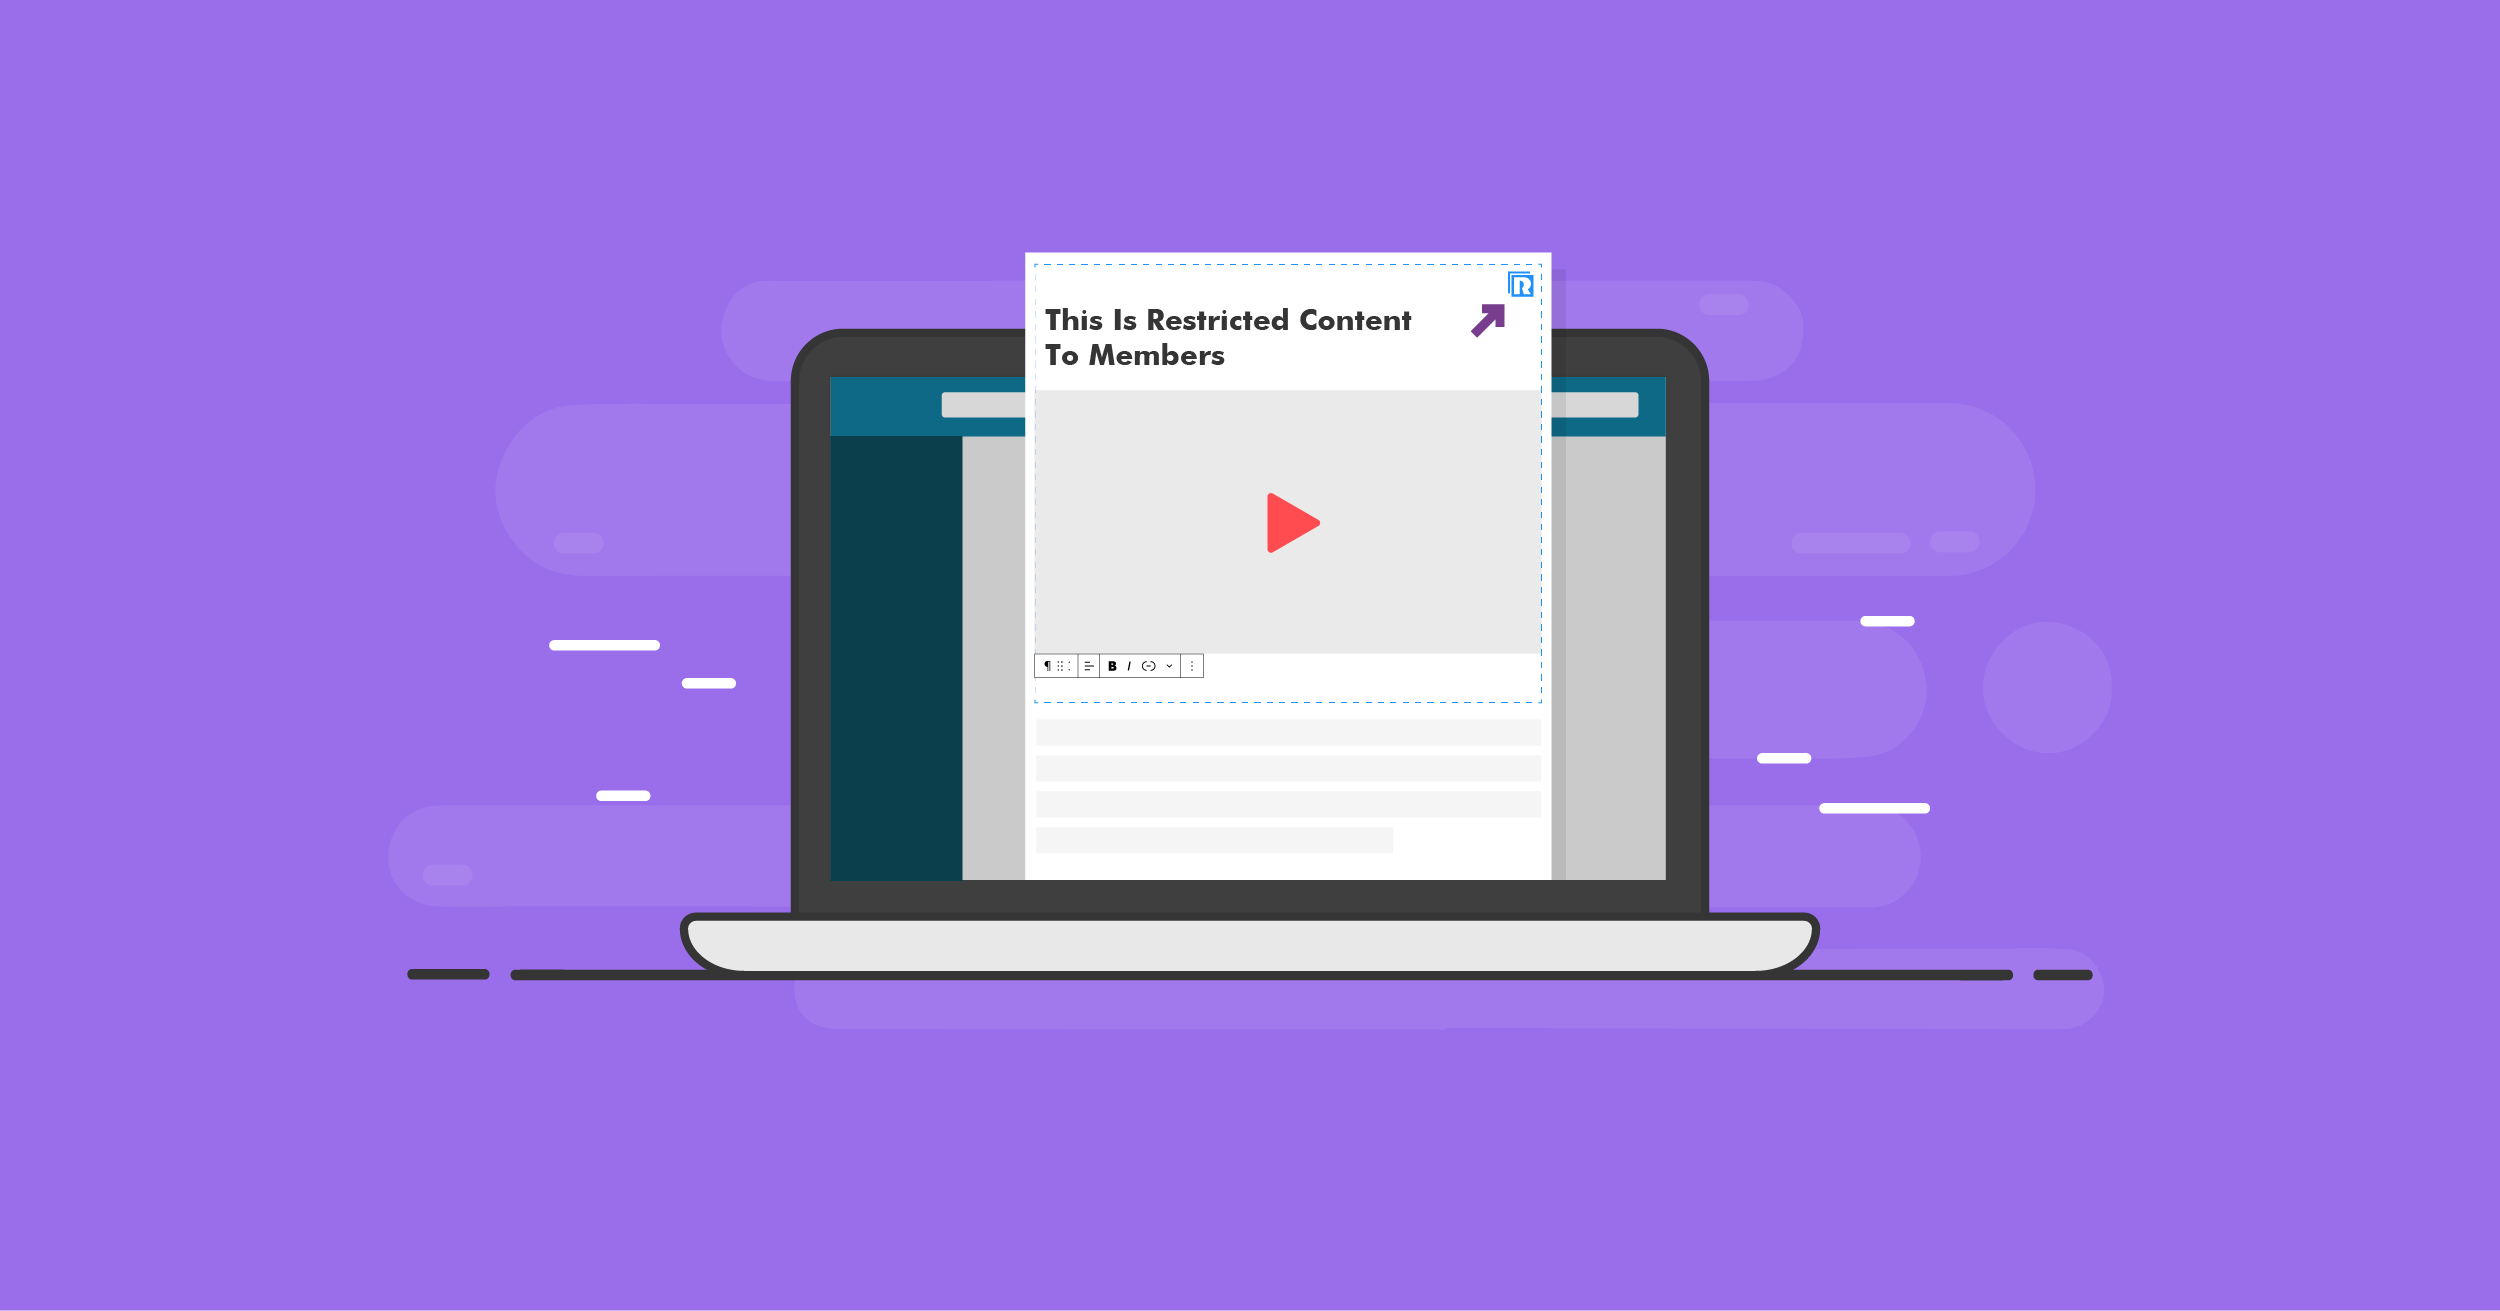
- For this example, we’re creating a watercolor painting course, so we dropped a video and descriptive text into the Row Layout block, then restricted based on all our membership levels. When navigating away from the Row Layout block, the Restrict Content Pro logo will display, indicating the row is restricted.
Bonus: Adding a Paywall with the Content Upgrades Redirect Block
While we’re busy in the block editor, keep in mind that it’s also easy to add a paywall to the same post or page that will encourage anyone without a membership to buy one to get access. It’s easy with Restrict Content Pro’s Content Upgrades Redirect Block.
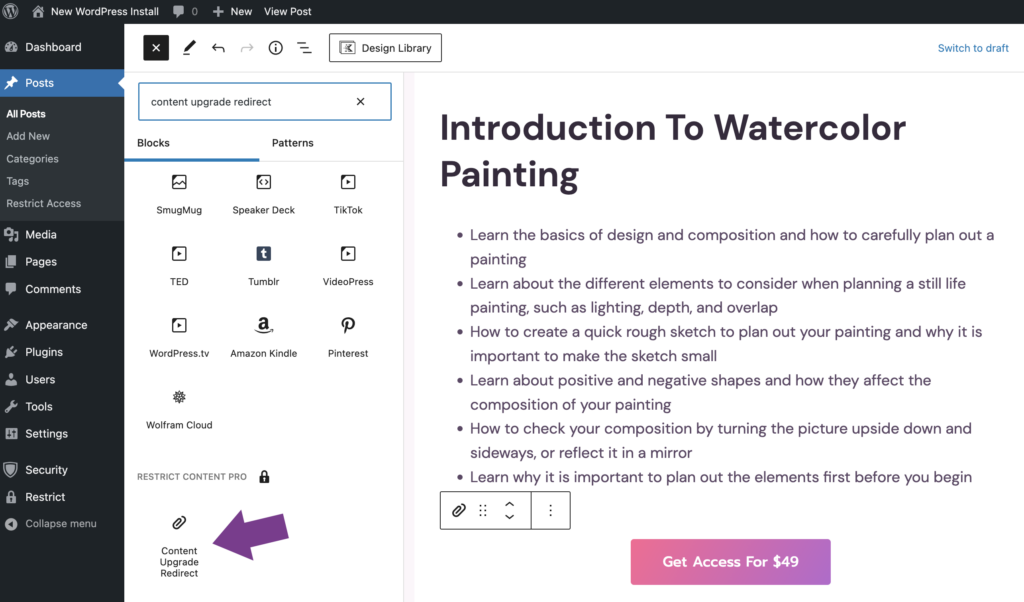
With the Content Upgrades Redirect Block, you can make it simple for visitors to buy a membership or subscription from your free content. Plus, you can provide a stellar customer experience from free content to paid.
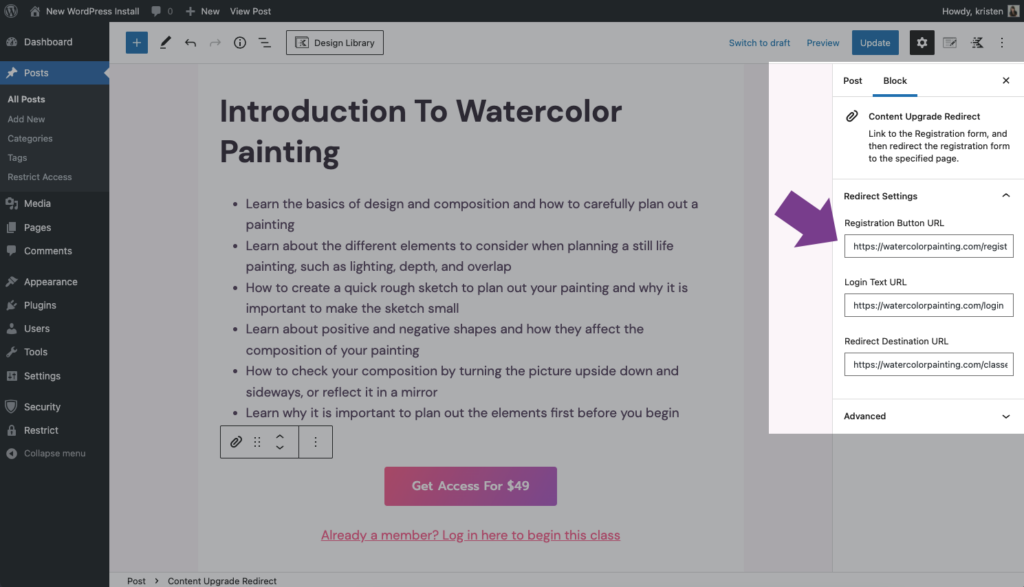
After adding the Content Upgrades Redirect Block, you can fine-tune your customer experience by adding custom URLs for the button and login link below it. When you click on the Content Upgrade block itself in the editor, you’ll see additional settings to customize these 3 places you want people to land after clicking the button itself or the paragraph text below it:
- Where to buy/register (when they click the button)
- For existing members, where to log in (linked from paragraph text below the button)
- Where they ultimately end up after they buy/register or login
That’s it! Paired with the new Kadence Blocks content restriction options, your site will become a high-converting membership machine.
Download Kadence Blocks and Restrict Content Today to Get Started
The new integration between Kadence Blocks and Restrict Content Pro gives you an even more powerful way to control the display of your premium content and give access to your valued members.
Download the free version of Kadence Blocks and Restrict Content, or grab a Restrict Content Pro or Kadence Blocks Pro to add even more features to your site.