AWeber Pro
The AWeber Pro add-on for Restrict Content Pro (RCP) will integrate your site with AWeber, a powerful email marketing service that makes it very easy for you to communicate with and retain your customers.
This add-on requires a Professional or Ultimate Restrict Content Pro license key and an AWeber account.
Installing The AWeber Pro Add-On
Download and install the plugin from your account dashboard here. If you need help installing the plugin, refer to the WordPress plugin installation documentation.
To license the plugin, please view our “How Do I License iThemes Products on My Sites” article.
Configuring The AWeber Add-On Settings
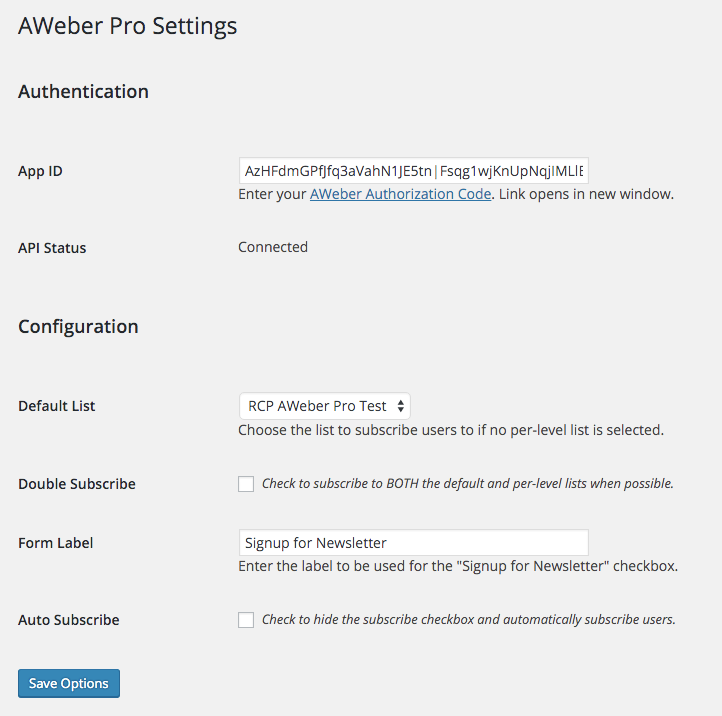
- App ID – Click the “AWeber Authorization Code” link to connect to your AWeber account.
- API Status – This will let you know whether or not you are successfully connected to your AWeber account.
- Default List – This is the list new members will be added to by default. This can be overridden for each individual subscription level (see “Selecting a different list for each subscription level” below).
- Double Subscribe – When checked on, members will be subscribed to both your chosen Default List and the list selected on the subscription level itself (provided they are different lists). This is a good idea if you want to have one master list, then separate lists for each subscription level. If this is unchecked then the member will only be added to one mailing list: the list set for the subscription level they signed up for. If a list isn’t set for that level, then they’re added to the default list.
- Form Label – This is the label that will appear on the registration form next to the opt-in checkbox.
- Auto Subscribe – If checked on, the “Form Label” and checkbox will not appear on your registration form; members will be automatically added to your list and won’t have a choice to opt out during registration.
Selecting A Different List For Each Subscription Level
In addition to choosing one Default List you can also select different mailing lists for each subscription level. Add or edit a subscription level and you’ll find a dropdown for “AWeber List”. You can choose to use the global default option or customize the list for each individual subscription level.
Have more questions? Submit a request