Can I import members from a CSV file?
Yes, you can!
Import Tool
Version 3.1 added a CSV importer tool directly to Restrict Content Pro. Navigate to Restrict > Tools > Import to get started. You’ll be asked to import your CSV file and will be given a few other optional settings.
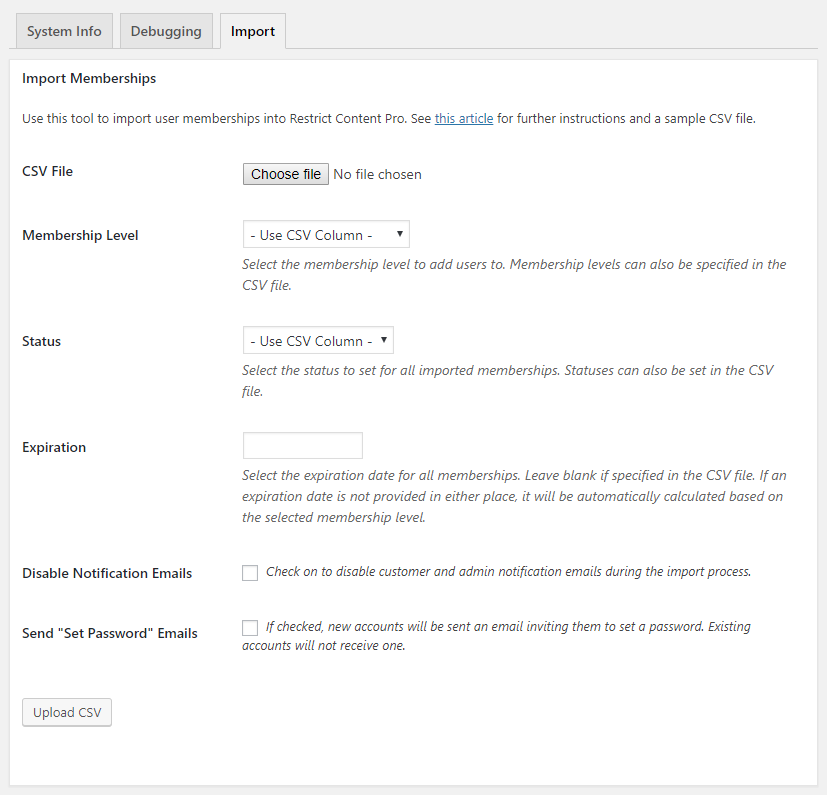
- CSV File – Upload your CSV file containing membership data. See the next section for a list of supported column headers.
- Membership Level – Choose which membership level to add each user to. If selected, all imported members will be placed on the same membership level. You can also select “Use CSV Column” if you have a column in your CSV file designating the membership level for each individual user.
- Status – Choose the status for the imported memberships (“active”, “expired”, etc.”). If selected, all imported memberships will be given the same status. You can also select “Use CSV Column” if you have a column in your CSV file designating the membership status for each individual user.
- Expiration – Choose an expiration date to apply to all memberships. Leave this blank if you have a column in your CSV file for the membership expiration date. If an expiration date cannot be found then it is automatically calculated based on the membership level.
- Disable Notification Emails – If checked on, RCP will disable all emails that normally get sent out (such as new user notification emails sent to site admins).
- Send “Set Password” Emails – If checked on, each new account that is created during the import will be sent an email inviting them to set a password. Existing accounts will not receive this email.
Note: If you are on a multisite installation you need to add "CSV" to the list of allowed upload file types in "Network Settings".

If you would like to update existing customer's information, please enable the Multiple Memberships found in Restrict > Settings > General. This will give you the added option to either "Add Additional Memberships" or "Update Existing Memberships."
Required And Optional Column Headers
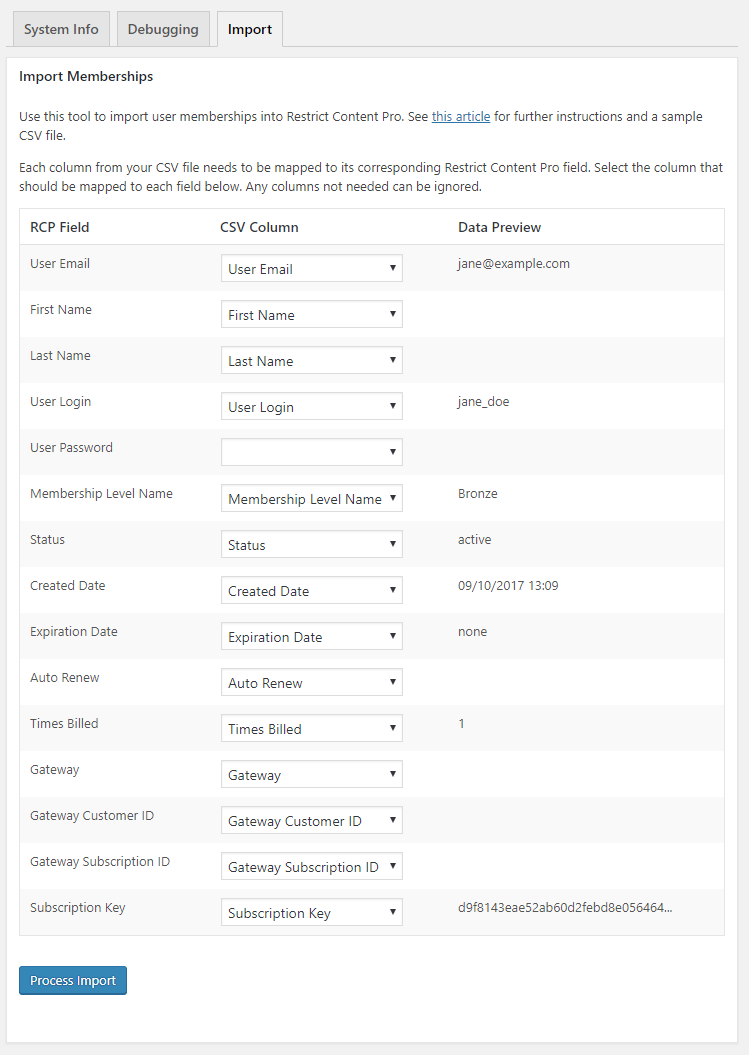
After filling out the form and selecting “Upload CSV” you will be asked to map your CSV file columns to Restrict Content Pro fields.
A sample CSV file can be downloaded here.
The “RCP Field” column is a list of all fields supported by Restrict Content Pro. The only two that are absolutely required are “User Email” and “User Login” (though the login can be the same value as the email). These are necessary in order to create the user account (or link with an existing user account)
The “CSV Column” is a dropdown of all the column headers parsed from your CSV file. You need to select the header from your CSV file that corresponds to the expected RCP field. If you do not have a column that matches the RCP field, just choose “Ignore this field” from the dropdown.
The “Data Preview” column is a preview of the import based on the first row in your column. So in the above screenshot, you can see that “[email protected]” was picked up as the first “User Email” field from the CSV file. You can also see that the “User Login” was picked up as “jane_doe”, the “Membership Level Name” was picked up as “Bronze”, etc.
Here’s a full list of supported RCP fields along with further explanations:
- User Email – Required. The email address for the user account.
- First Name – Optional. The user’s first name.
- Last Name – Optional. The user’s last name.
- User Login – Required. The username for the new account. If omitted then the email address is used as the username.
- User Password – Optional. The password to use for new accounts. If omitted then a password is randomly generated.
- Membership Level Name – Optional. The name of the membership level to add the user to. If this is omitted then you need to have selected a membership level from the form on the previous page.
- Created Date – Optional. The date the membership was first created. If omitted then this is set to the date of the import.
- Expiration Date – Optional. The date the membership expires (or the next renewal is due). If omitted then this is calculated from today.
- Auto-Renew – Optional. If the user already has a recurring membership then this should be set to “1” or “yes”. This should only be set if a recurring subscription is already set up in the payment gateway. Otherwise, it should be left blank or set to “0”.
- Times Billed – Optional. The number of times the membership has been billed. If omitted this is set to “0”.
- Gateway – Optional. Gateway slug. Supported slugs are: stripe, stripe_checkout, PayPal, paypal_express, paypal_pro, twocheckout, braintree, manual, authorizenet.
- Gateway Customer ID – Optional. The ID of the customer’s profile at the payment gateway. This is used for the Stripe and Braintree gateways only.
- Stripe: this value begins with
cus_ - Braintree: this is the ID number of their customer profile inside Braintree. This value should be prefixed with
bt_, even if the ID does not actually have this prefix in Braintree.
- Stripe: this value begins with
- Gateway Subscription ID – Required if “Auto Renew” is enabled for this member. This is the ID number of the recurring subscription in the gateway. See below for expected values for each gateway:
- Authorize.net: This is the ID of the subscription in Authorize.net. When importing, edit the ID to prefix it with
anet_. For example, if the subscription ID is1234567then it should be entered in the CSV file asanet_1234567. - 2Checkout: This is the ID of the order in 2Checkout. When importing, edit the ID to prefix it with
2co_. For example, if the order ID is1234567then it should be entered in the CSV file as2co_1234567. - Braintree: This is the ID of the subscription in Braintree.
- PayPal: This value beings with
I- - Stripe: This value beings with
sub_
- Authorize.net: This is the ID of the subscription in Authorize.net. When importing, edit the ID to prefix it with
- Subscription Key – Optional. A string of characters unique to this membership only. Usually, this field will be left blank unless you’re importing members from another Restrict Content Pro installation.
Importing custom fields
If you have other fields you’d like to import with your members then you can read our separate tutorial on how to import custom fields.
- RCP_Sample_Members_Import-v4.csv (671 Bytes)
Have more questions? Submit a request