Content Upgrade Redirect
Content Upgrade Redirect block was added to Restrict Content Pro version 3.5.8 in order to help upsell your free content.
This guide will walk you through the setup for Content Upgrade Redirect Block.
1) Adding the block
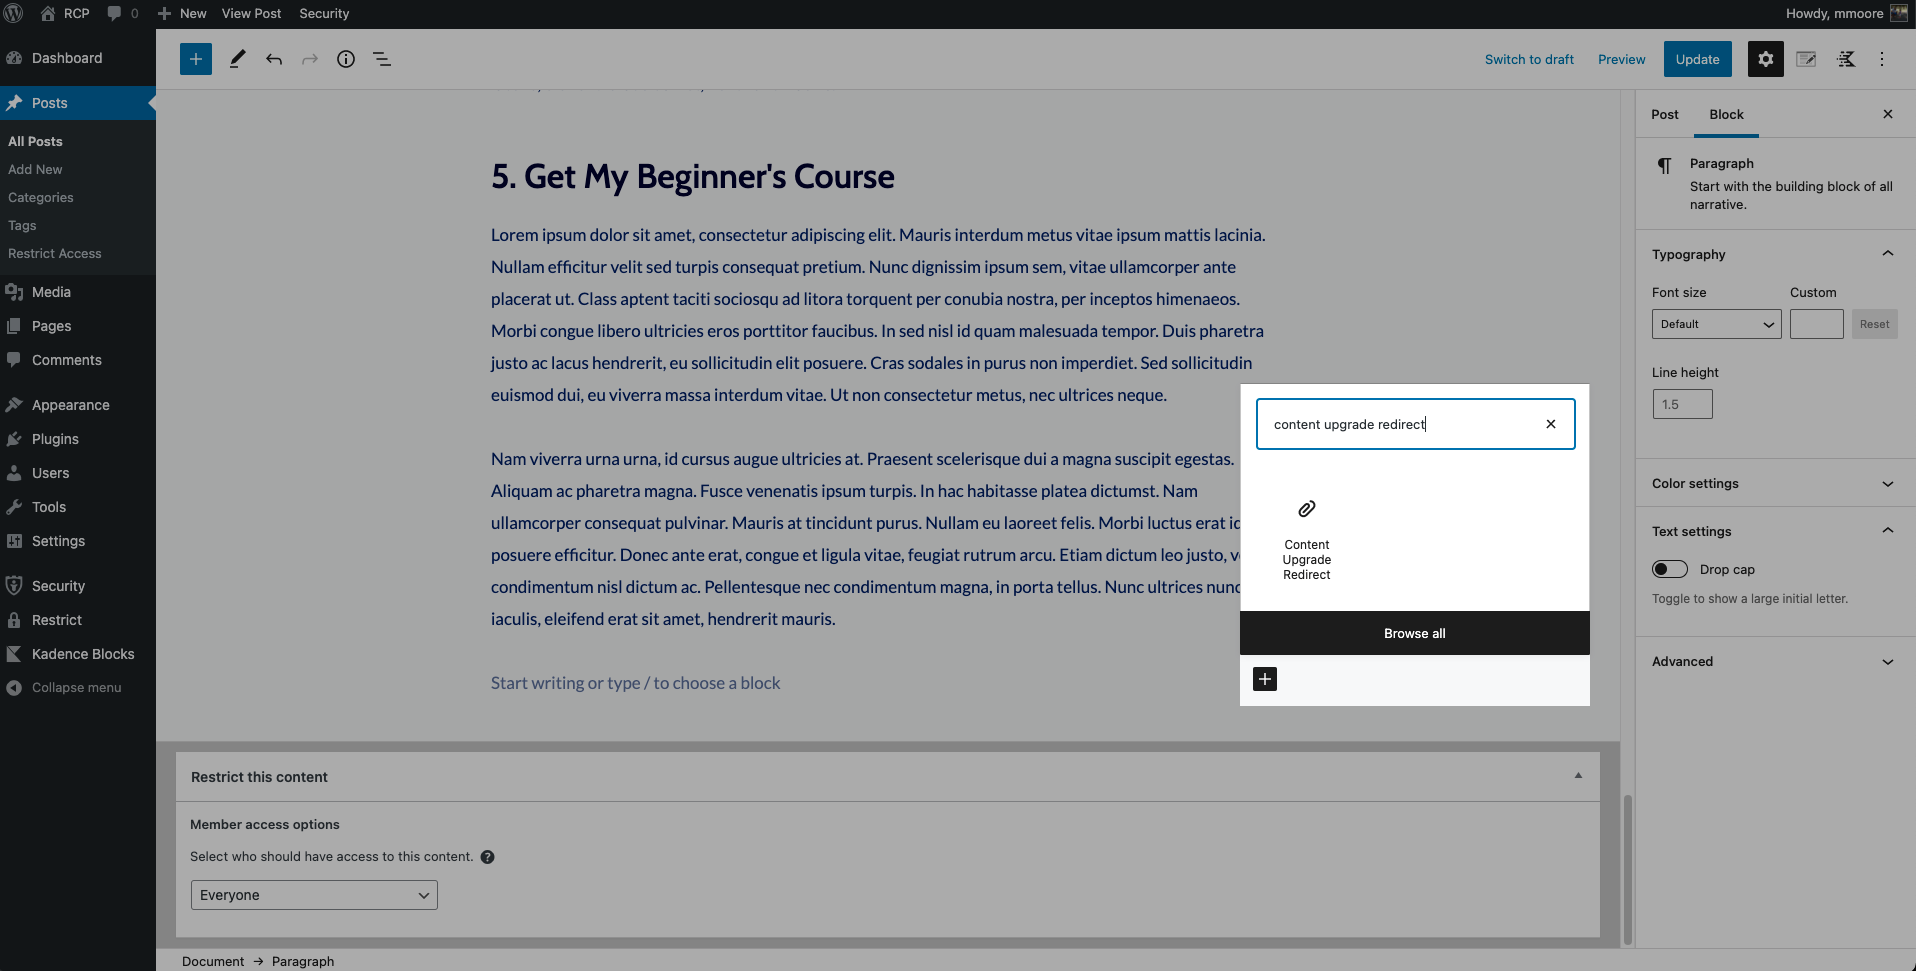
First, you’ll want to add the block to any page or post on your website that needs a stellar upsell button. The Content Upgrade Redirect Block can be found in the block library in a new section for Restrict Content Pro blocks or by searching for “Content Upgrade Redirect” from the Block inserter icon, “+”.
2) Configuring the block
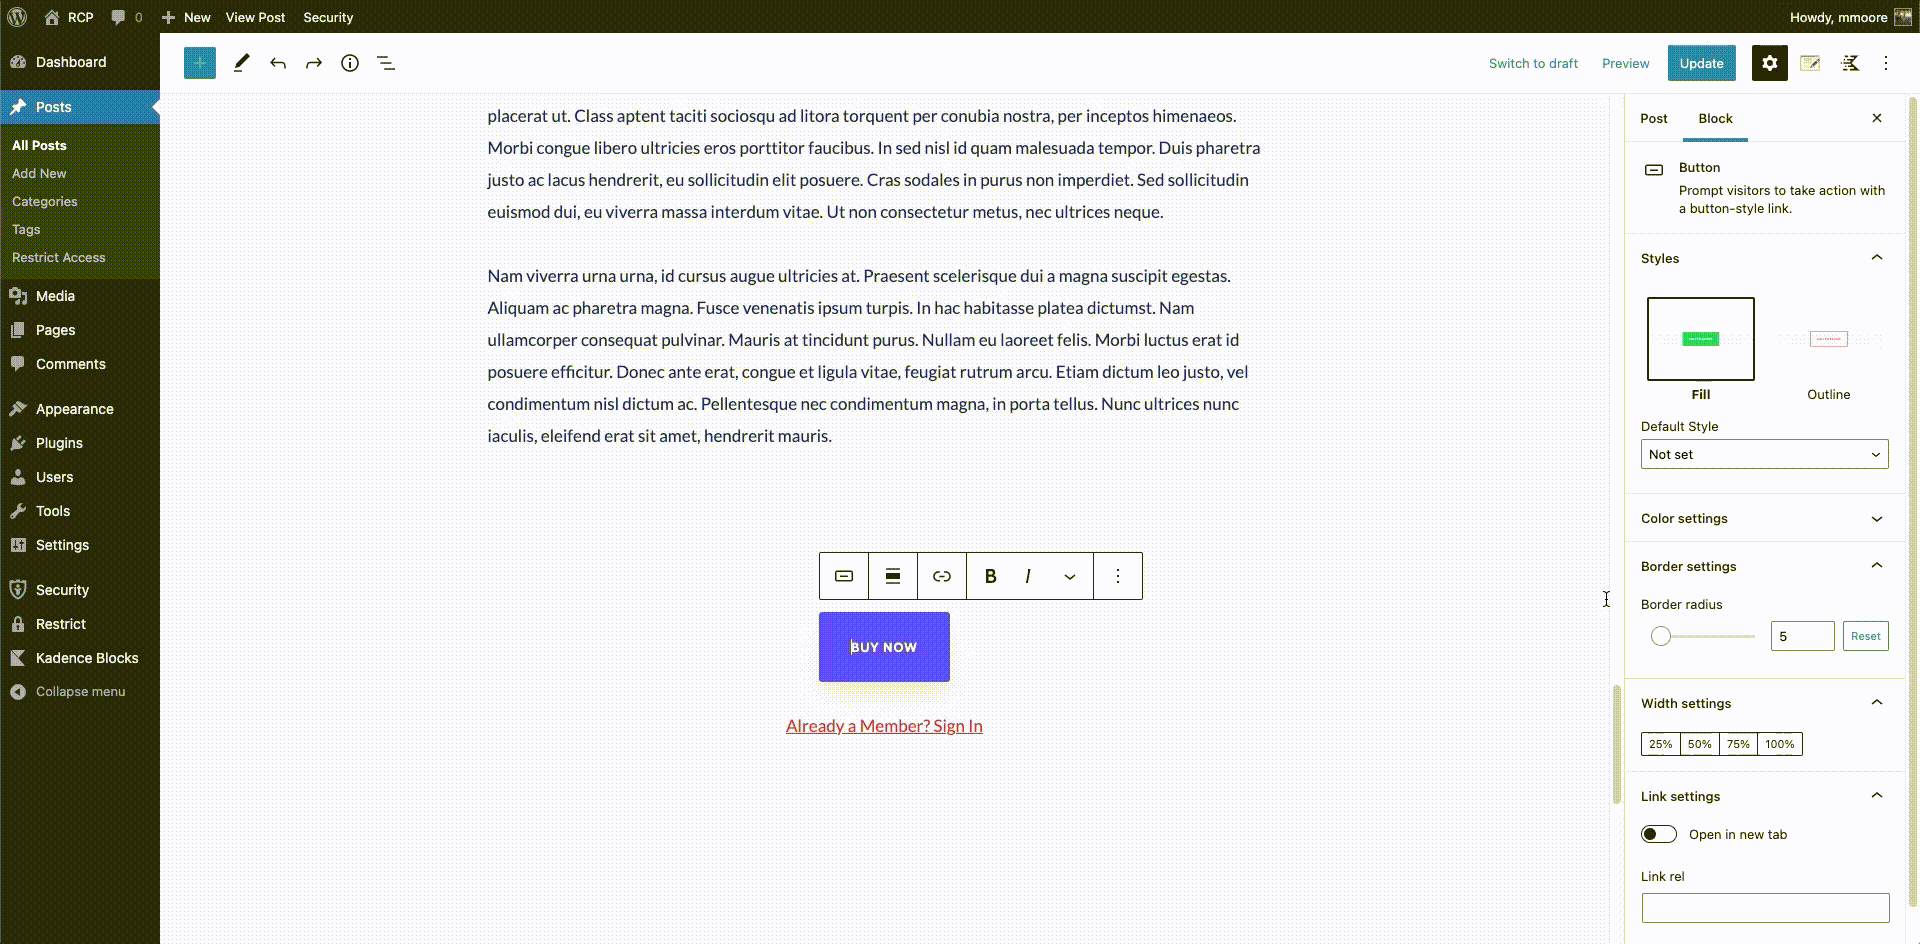
Once you have added the Content Upgrade Redirect block, you’ll see it is composed of two familiar blocks, the button and paragraph blocks used by the WordPress Block Editor.
- Click on the button to add your custom text.
- Beneath the button, you can customize the paragraph text. It is designed to be a simple link for existing members, telling them where to log in.
To the right of your screen, you can access all the block settings. Using the block settings panel, you can customize the look and feel of both the button and paragraph blocks to your heart’s content.
Note: We used Kadence Theme and Blocks. For more information on Kadence, please visit https://www.kadencewp.com/ or view all of the documentation here.
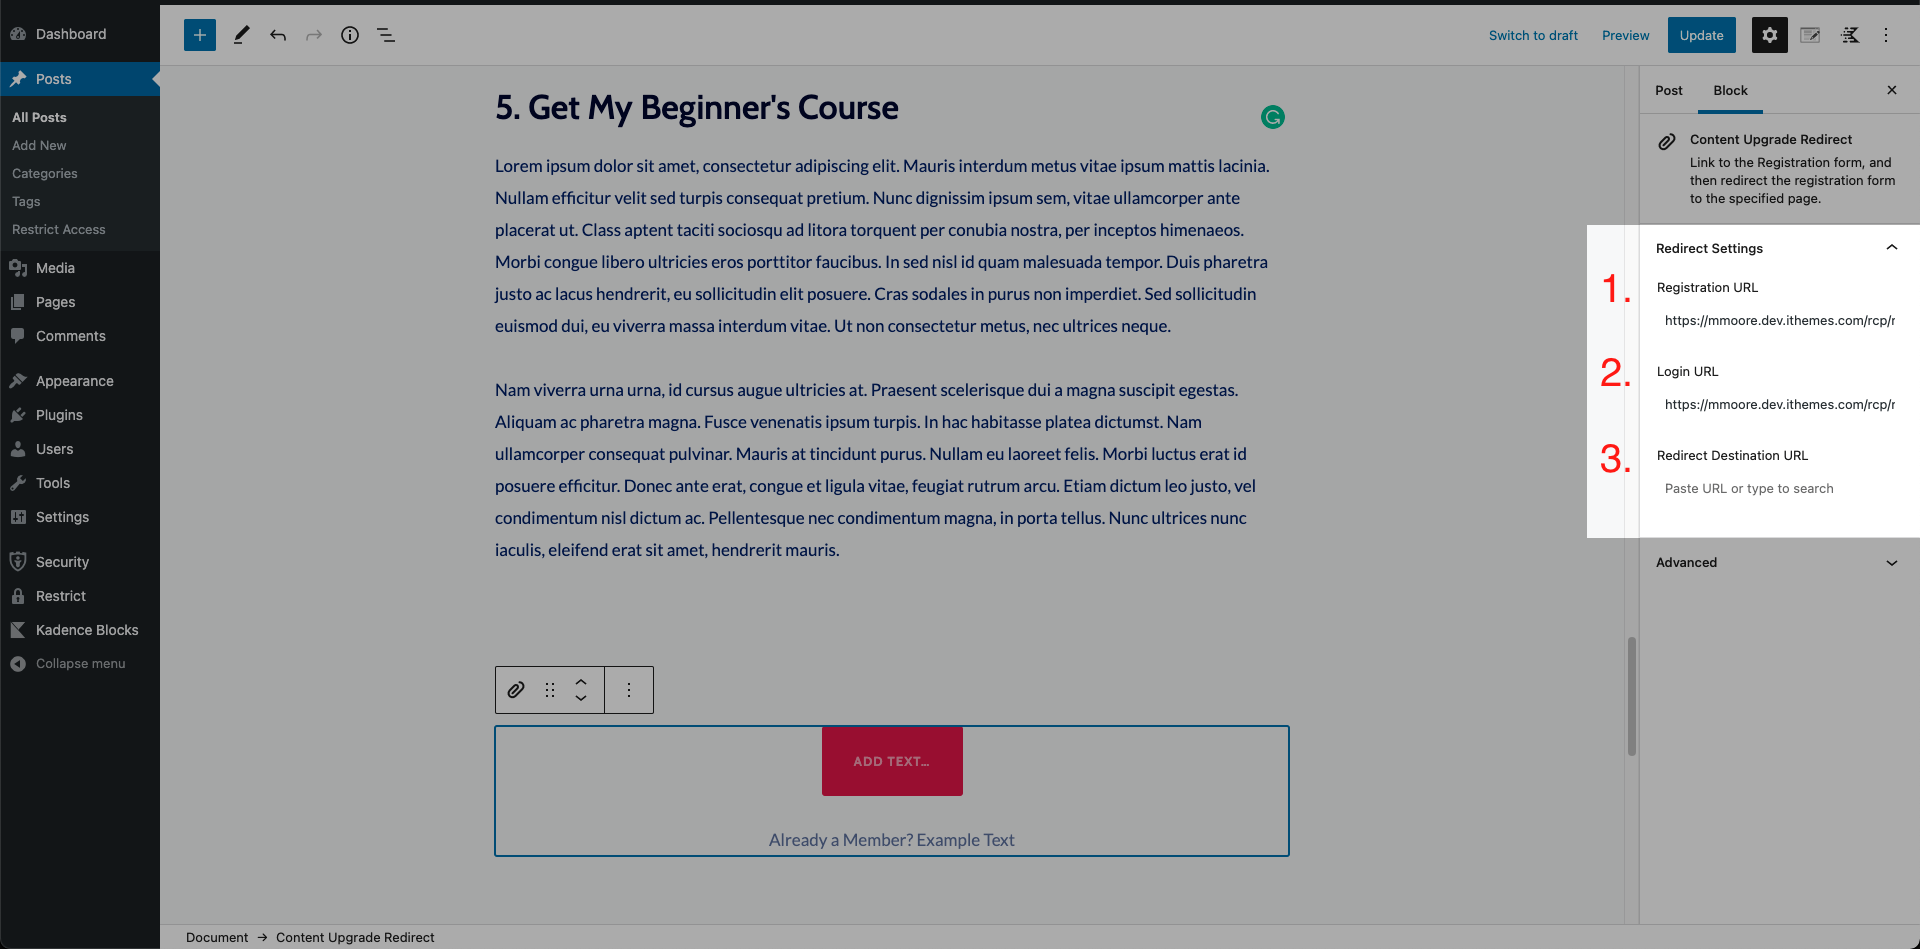
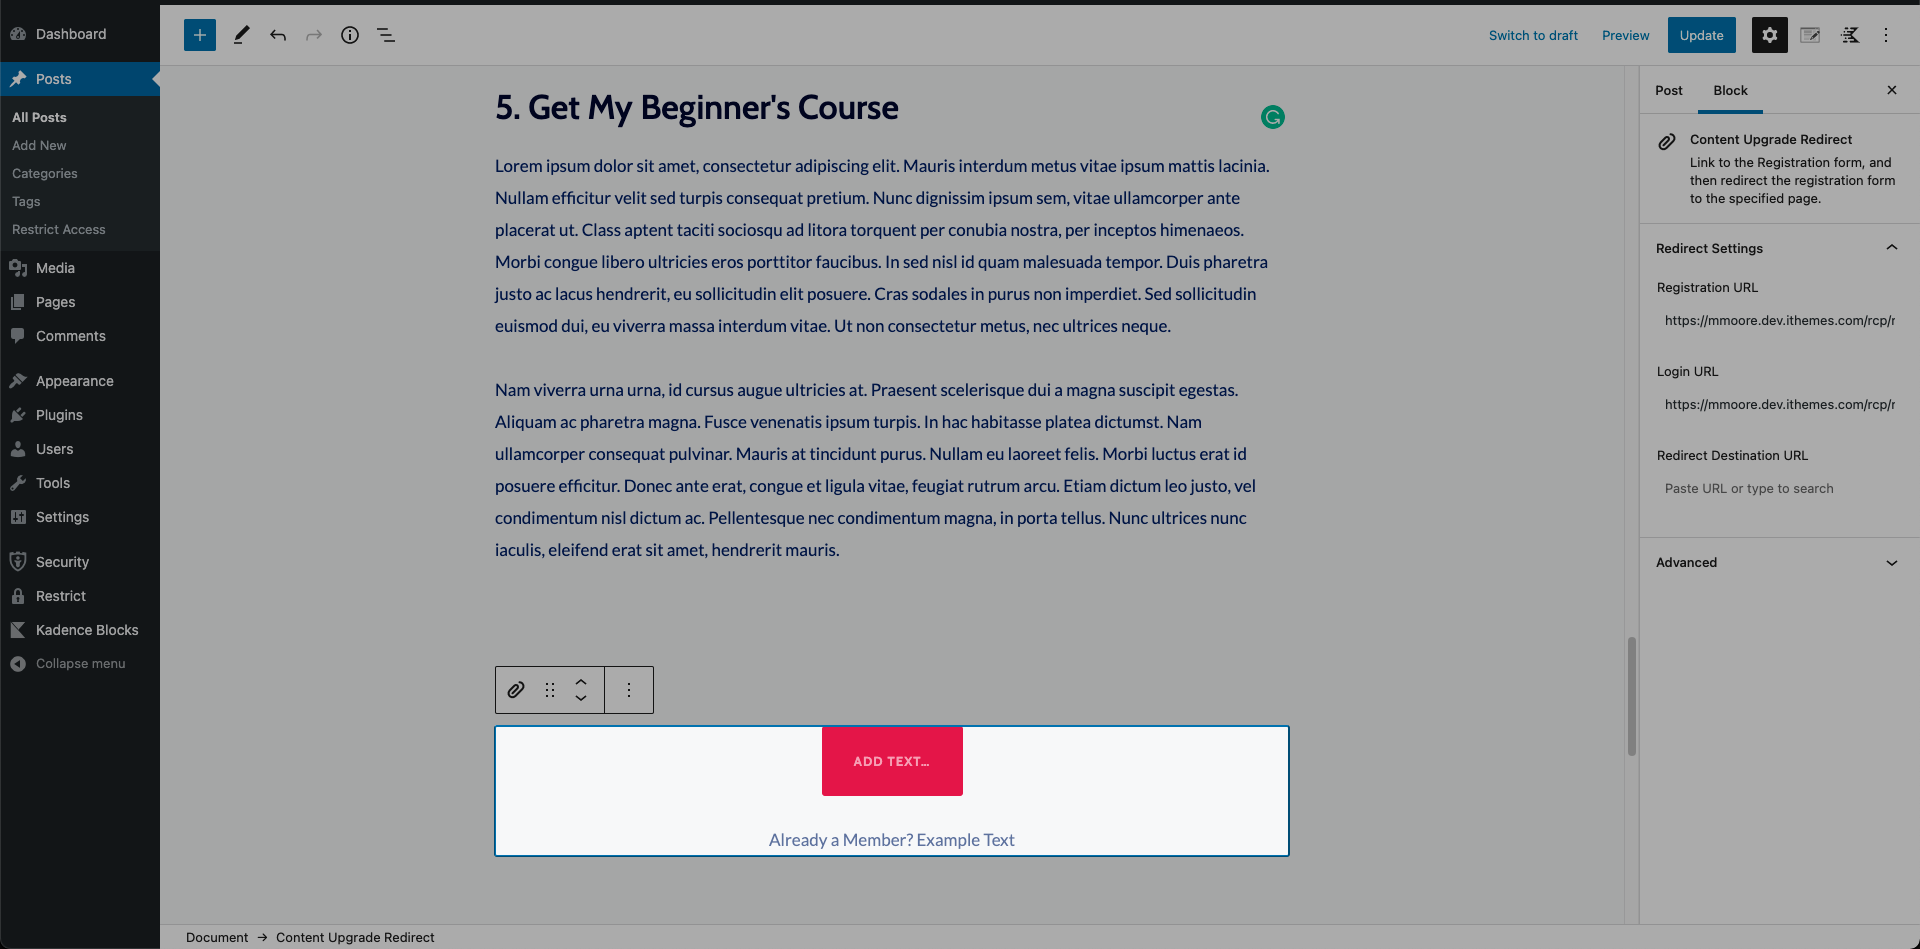
3) Block settings
When you click on the Content Upgrade block itself in the editor, you’ll 3 see additional settings to customize the URLs for the Content Upgrades Block:
Registration Button URL:
- Where to buy/register (when they click the button)
Login Text URL:
- For existing members, where to log in (linked from paragraph text below the button)
Redirect Destination URL:
- Where they ultimately end up after they buy/register or login