Getting Started with Restrict Content 3.0
Restrict Content 3.0 offers the following configuration to restrict your content on your site.
Configuring the Settings
The Settings page has five different categories split into five tabs: General, Payments, Emails, Invoices, and Misc.
To access the settings, please go to Restrict > Settings.

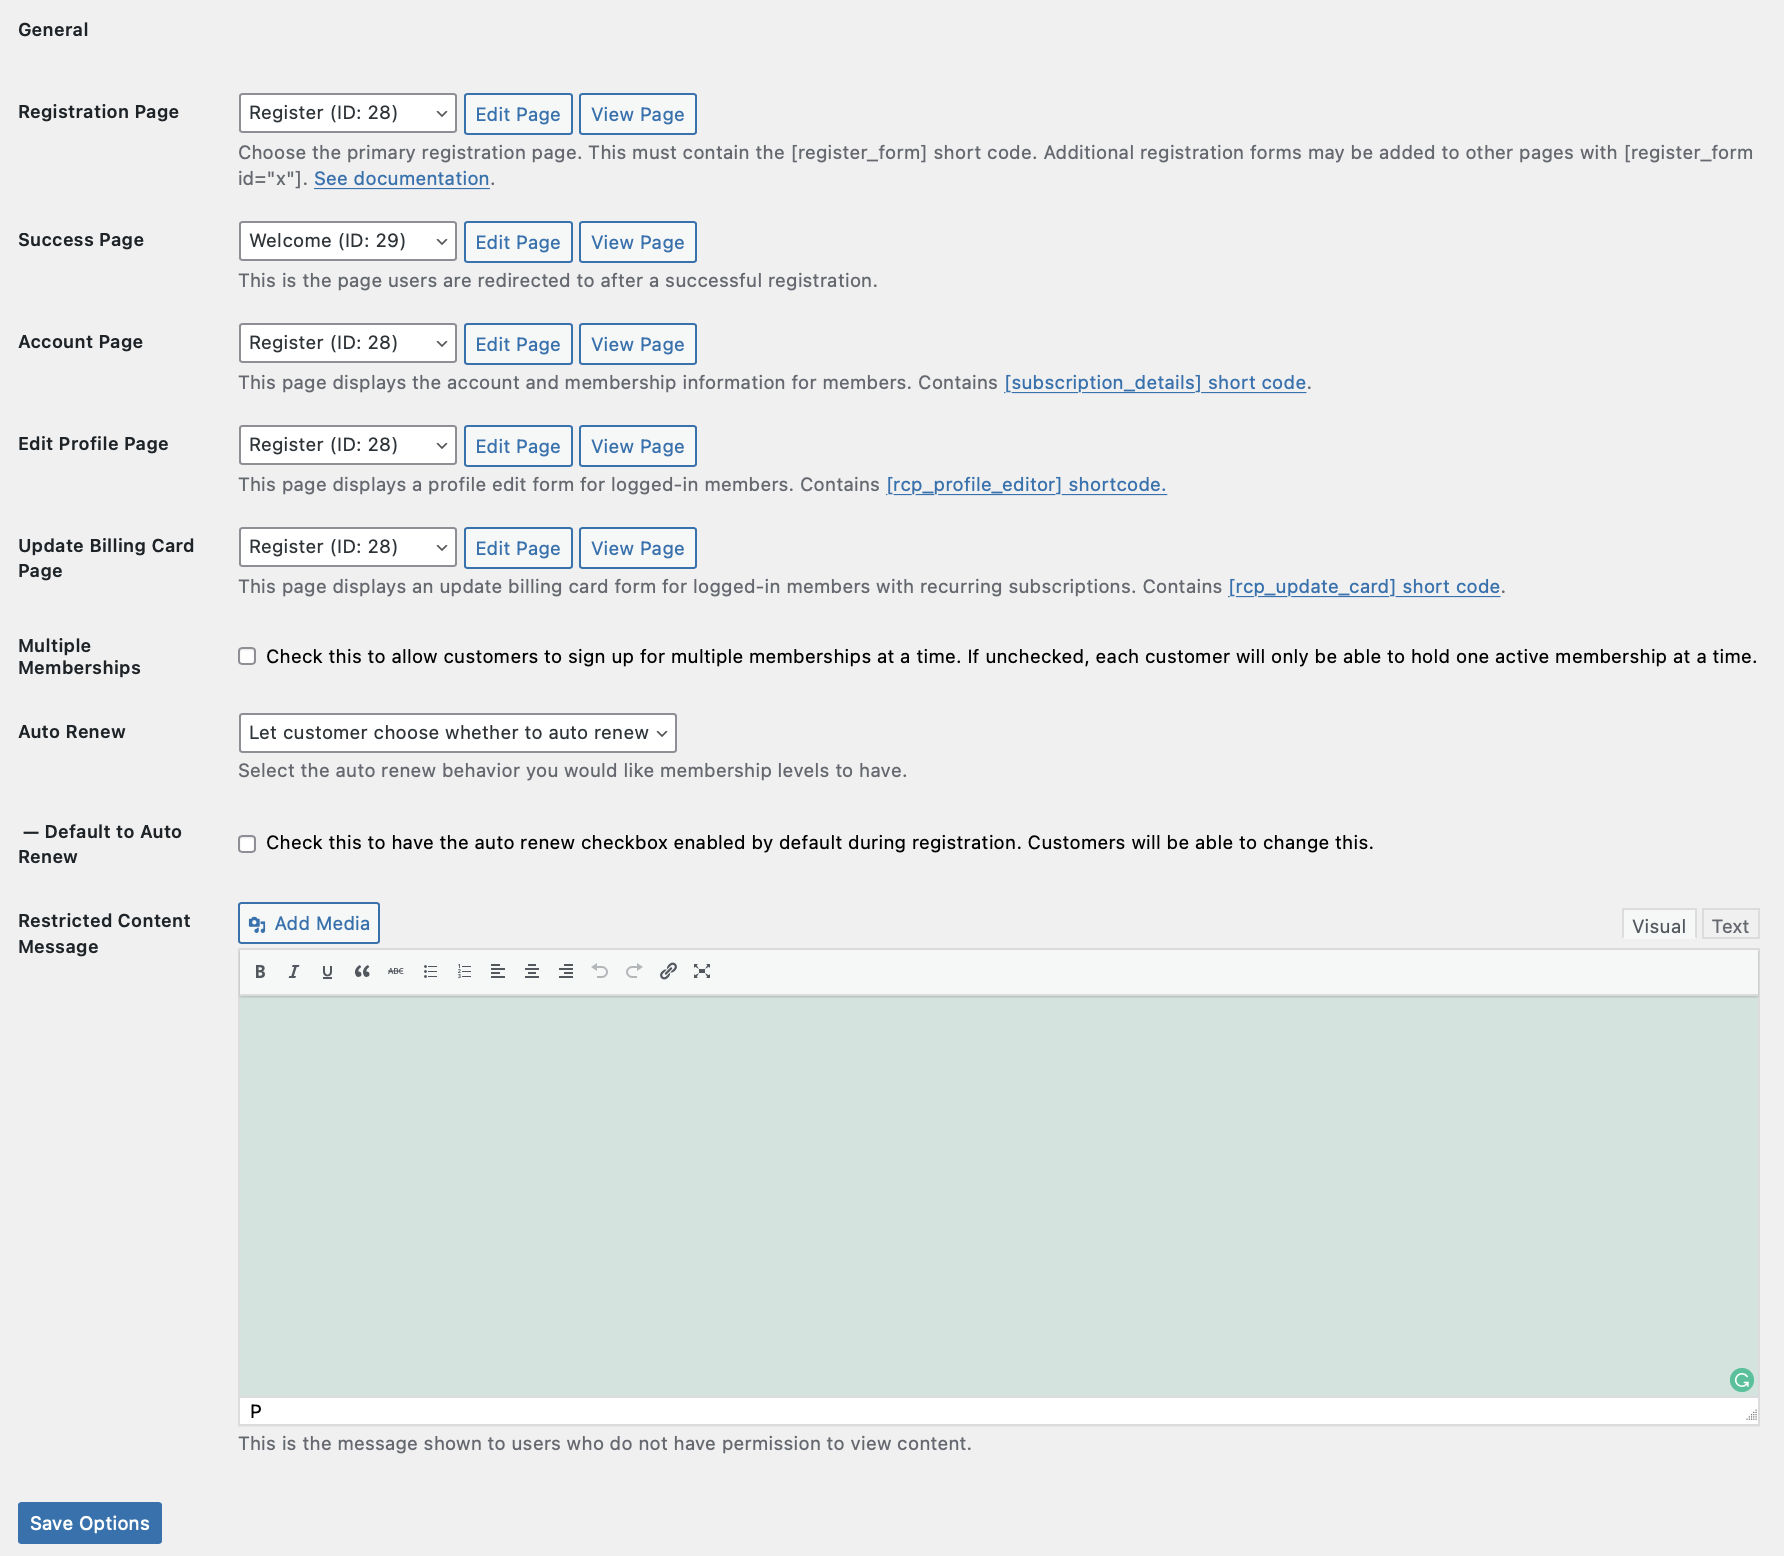
General Settings
The General settings tab has four key parts: Page selection, Multiple Memberships, Auto-Renewal, and Restricted Content Message.
- You to select which page you wish to designate as the “Registration Page“, “Success Page“, “Account Page“, etc.).
- You can enable the option for customers to sign up for multiple memberships at a time.
- You can decide whether or not to enable auto-renewals, or let your customers choose if they want this feature enabled. Learn more about the different Auto-Renewal here.
- The Restricted Content Message allows you to customize the restricted message to users who do not have access.
For more in-depth details of the General setting, click here.
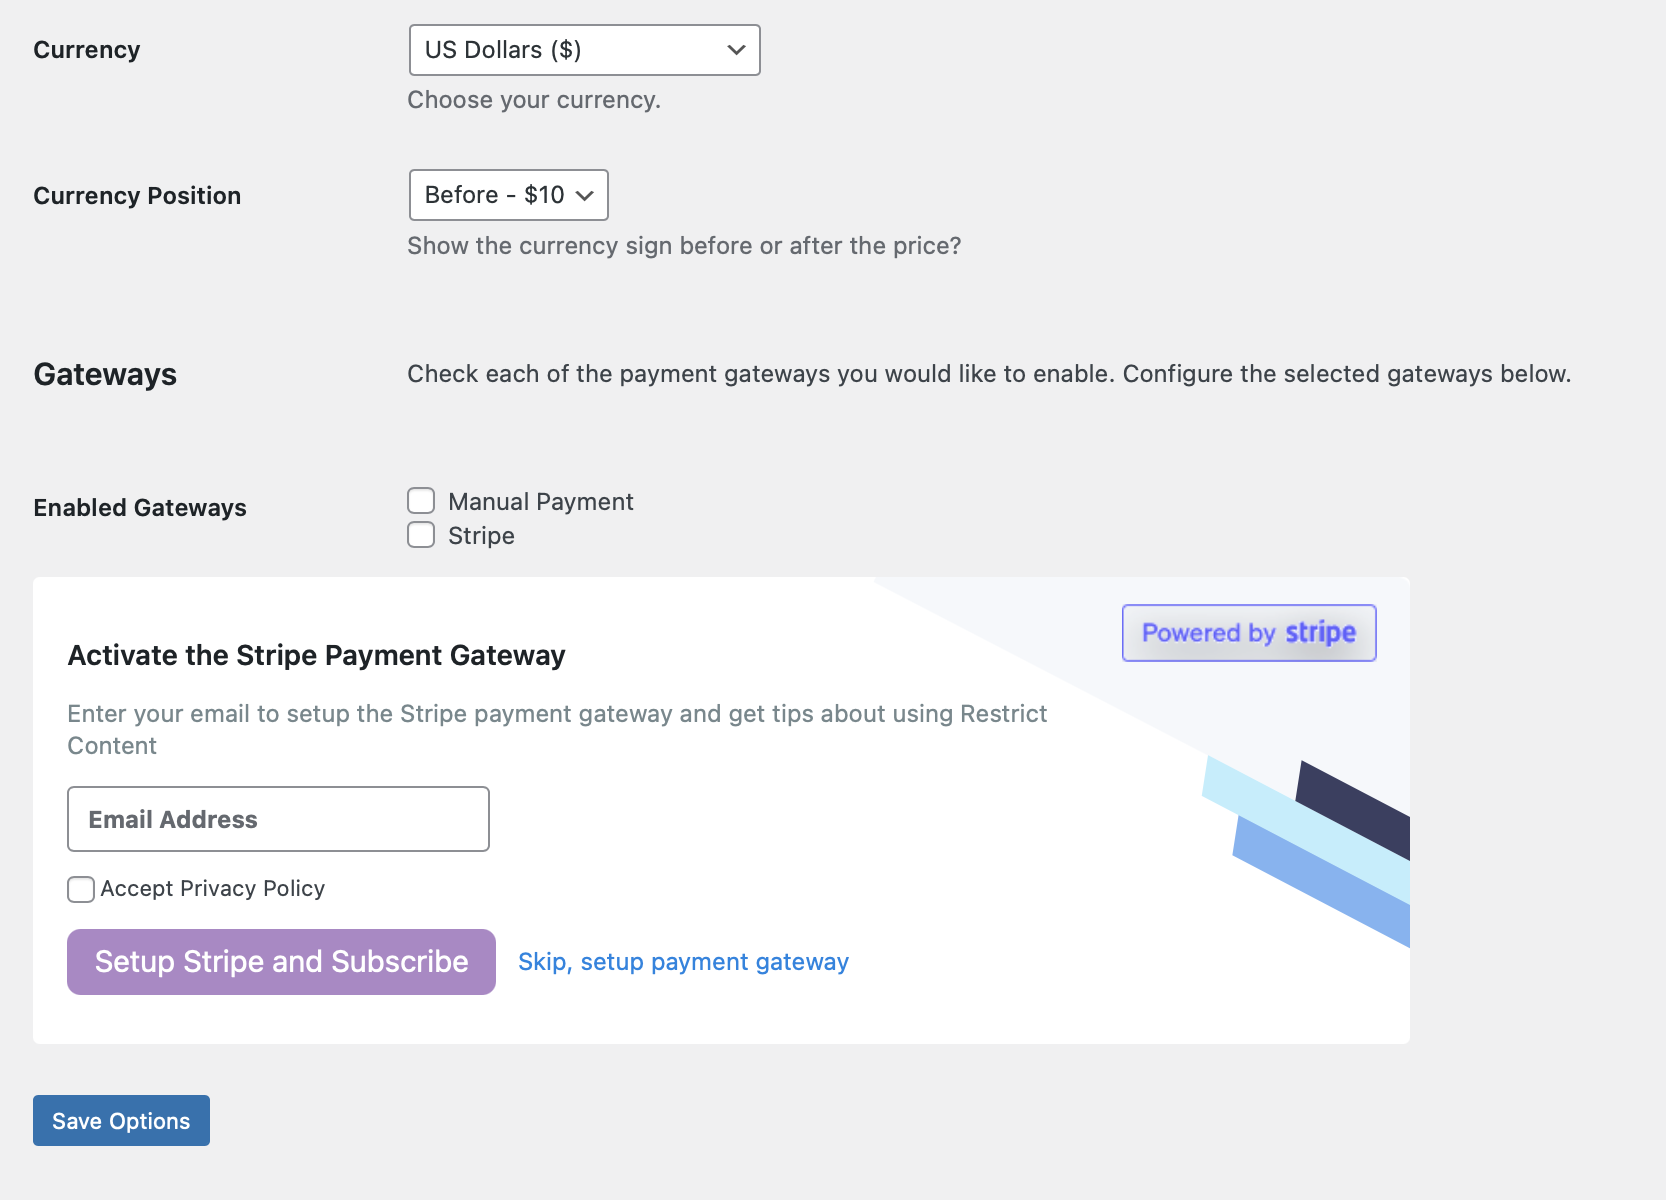
Payment Settings
The Payment tab allows you to choose your Currency and the Currency Position. There are also 2 payment gateway options to choose from – Manual Payment or Stripe.
Setting Up Stripe
To enable Stripe as your payment gateway, select Stripe as your “Enabled Gateways,” enter your email address and accept the Privacy Policy, then click on “Setup Stripe and Subscribe.” You will be prompted to create or connect to your Stripe account
You also have the option to skip the Payment Gateway Setup, if you wish to not connect to your Stripe account. 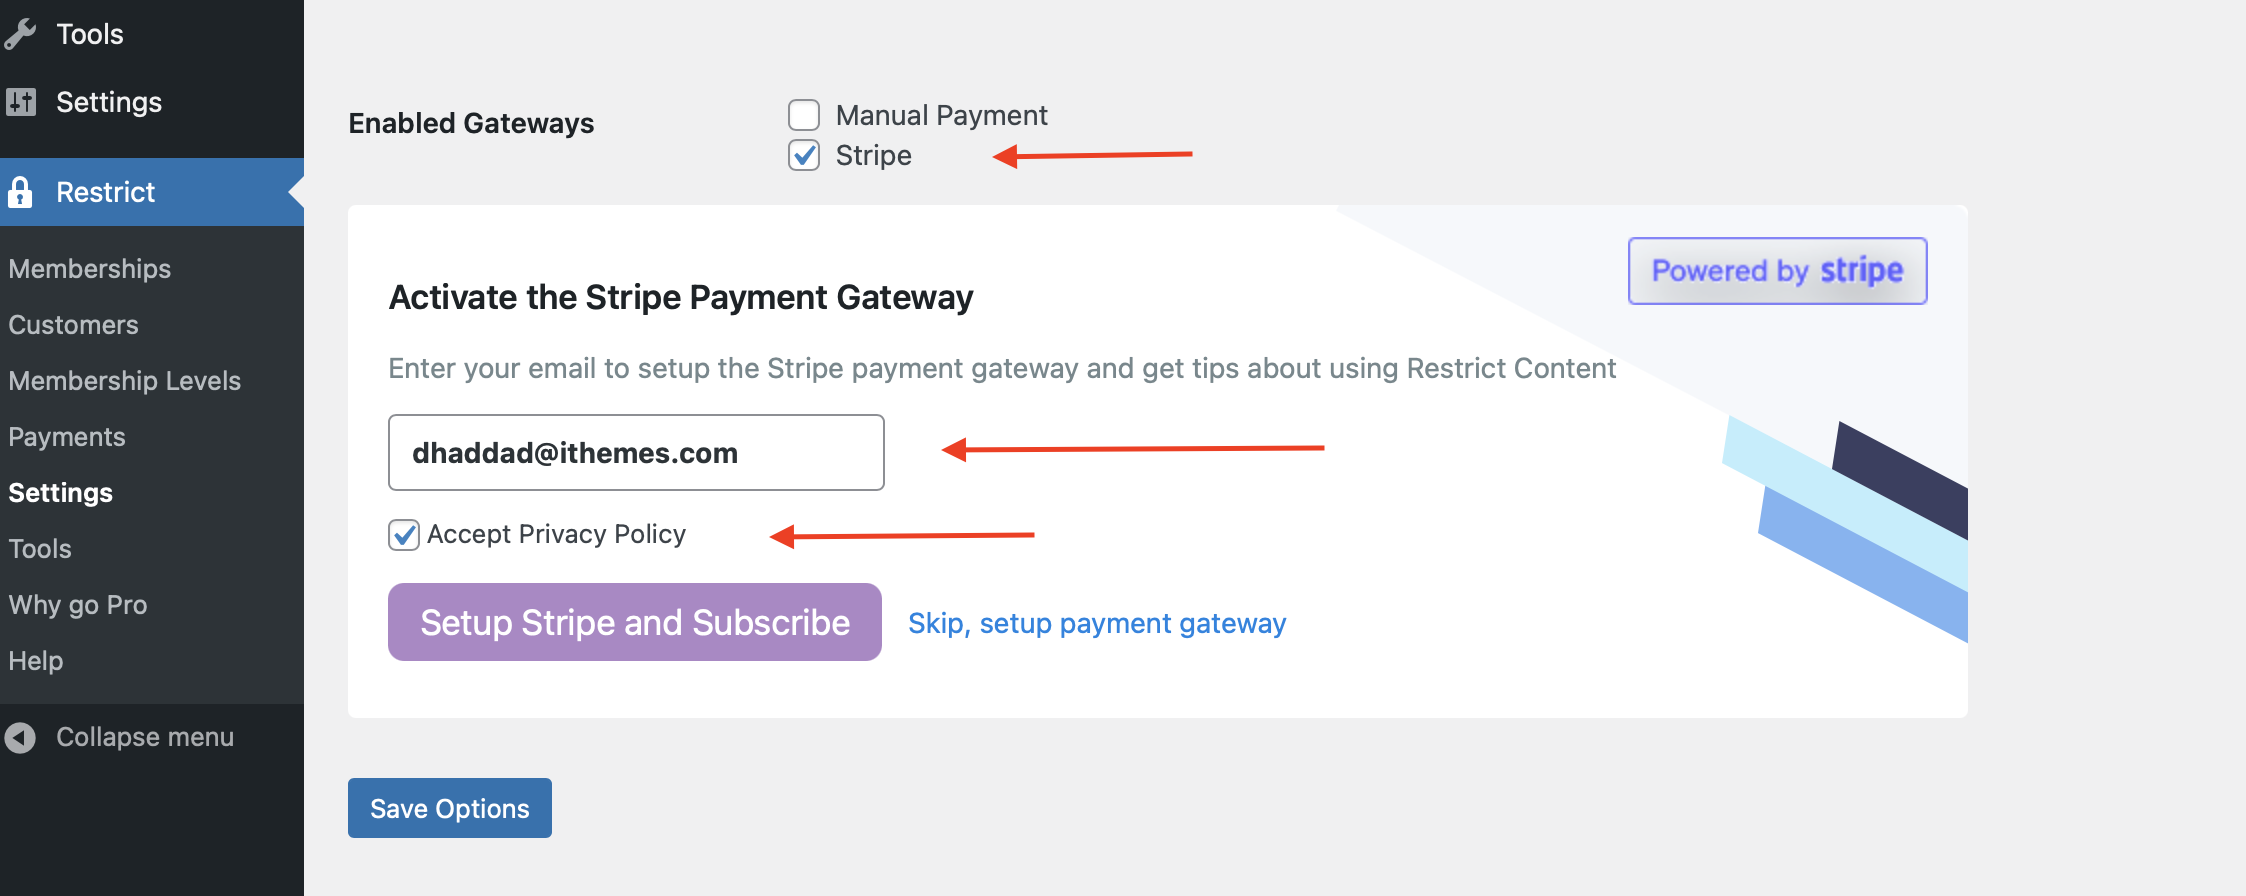
Note: In order for membership payments made through Stripe to be tracked, you must enter the URL to your Stripe Webhooks under Account Settings.
Enter “https://yoursite.com/?listener=stripe” for the URL and select All Events. Replace yoursite.com with the actual domain to your site.
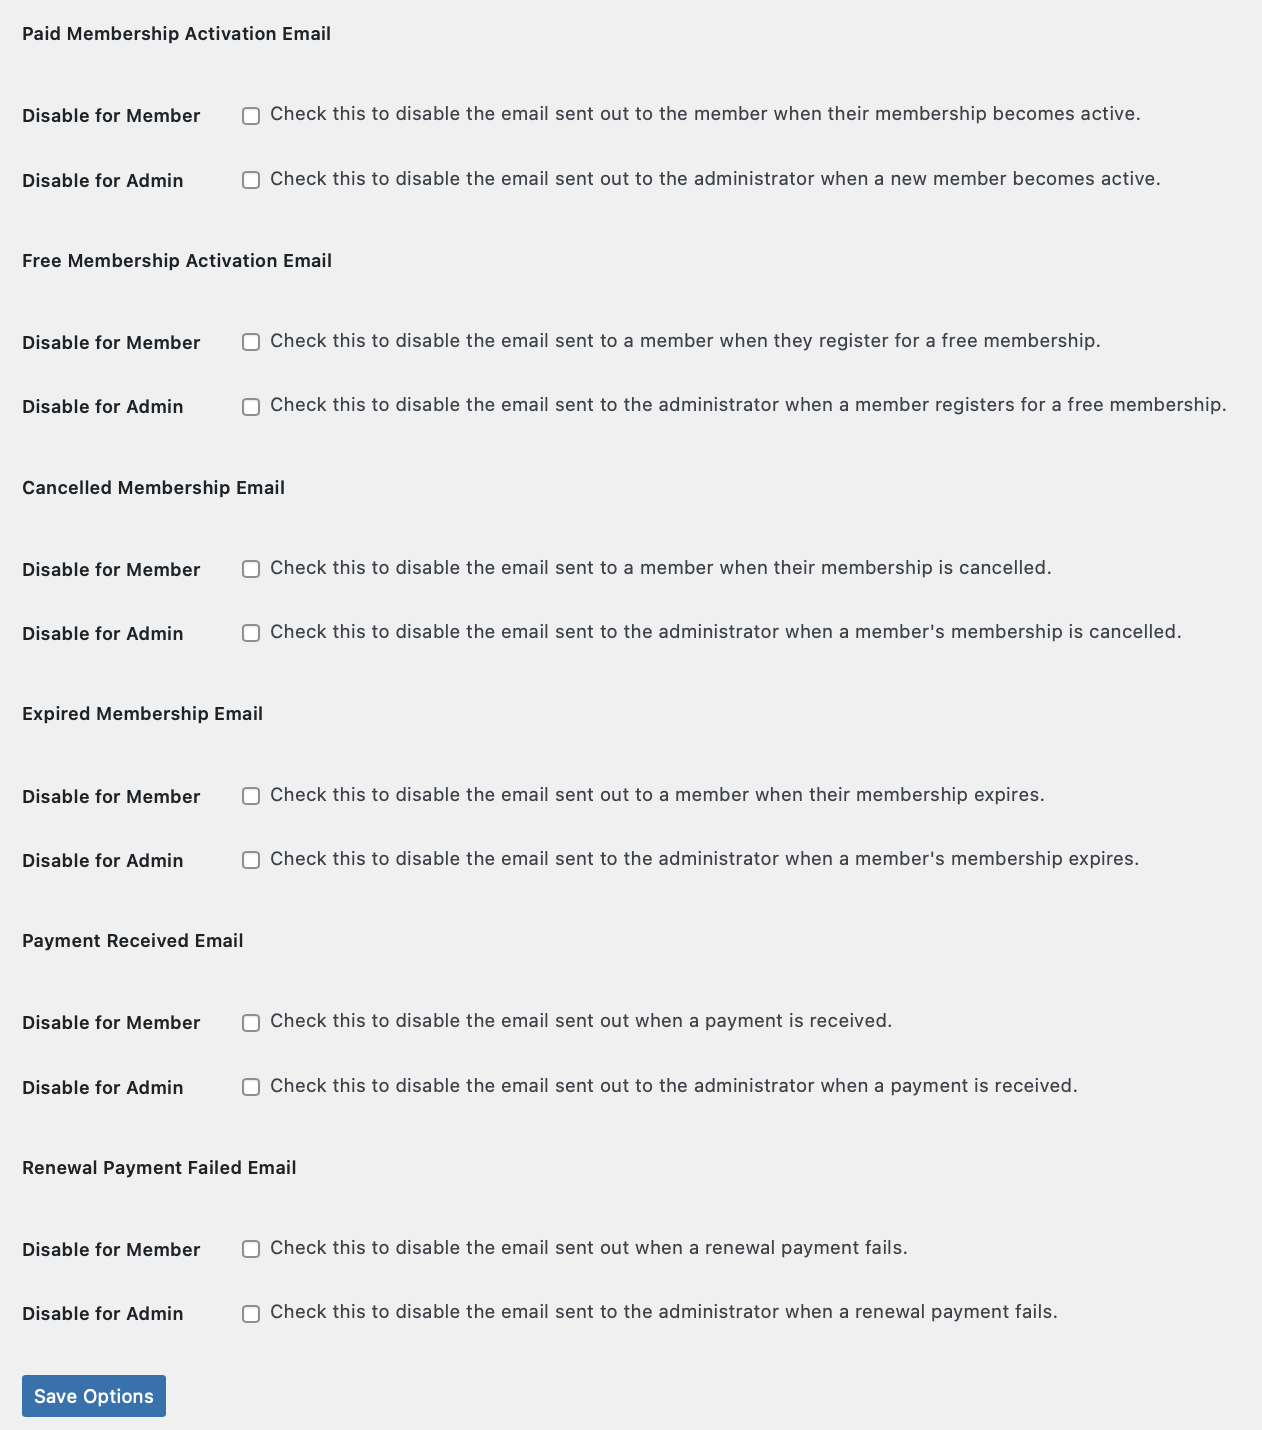
Email Settings
The Email tab allows you to decide whether or not you want to send Member or Admin notifications emails.
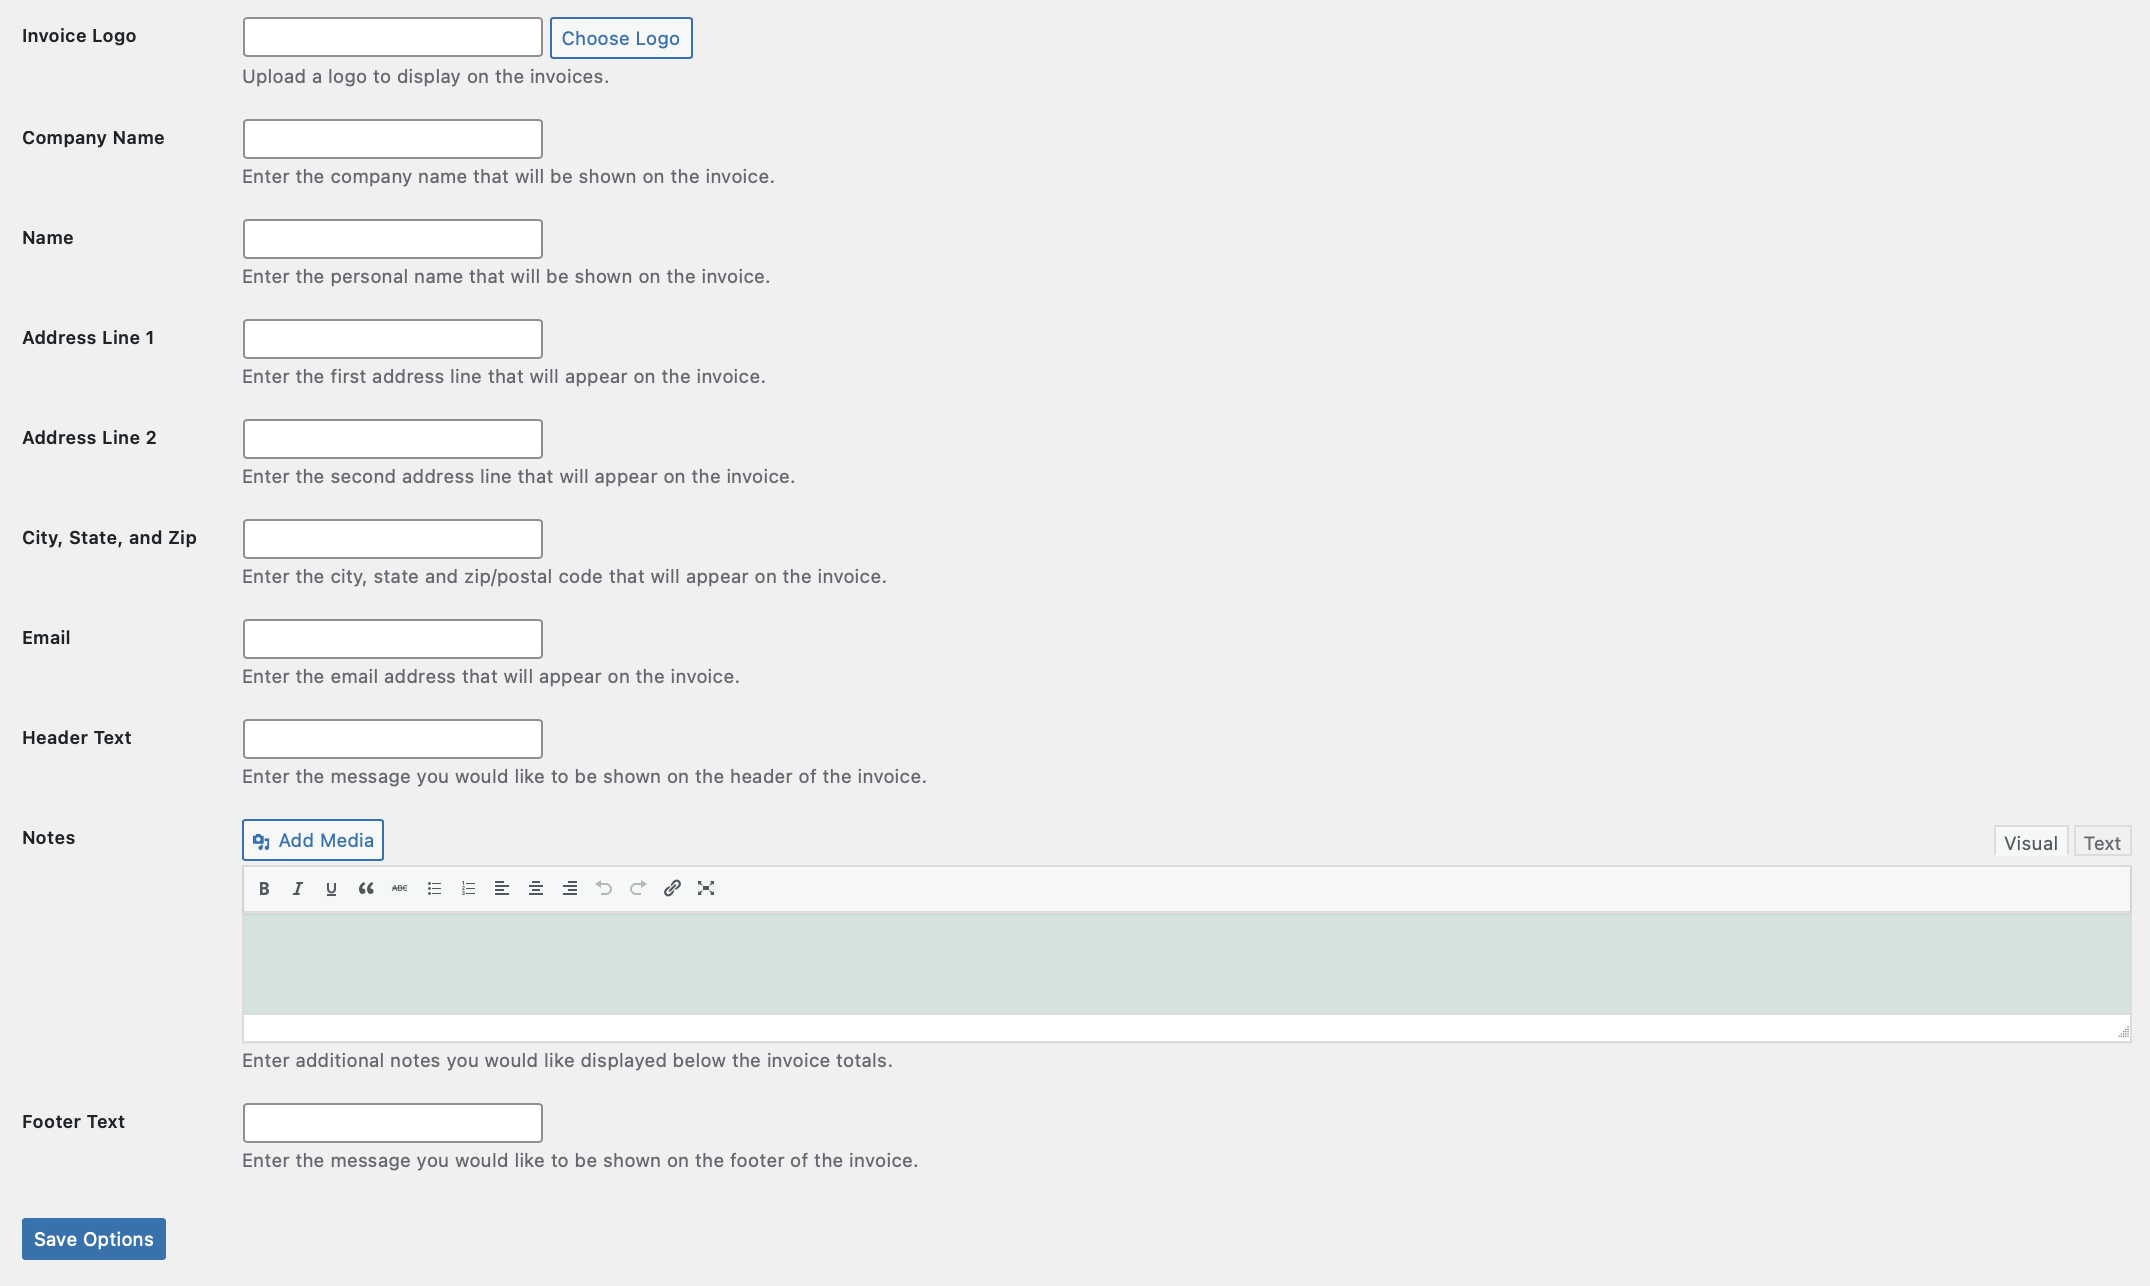
Invoice Settings
The Invoice tab allows you to set your logo, company name, address, etc.
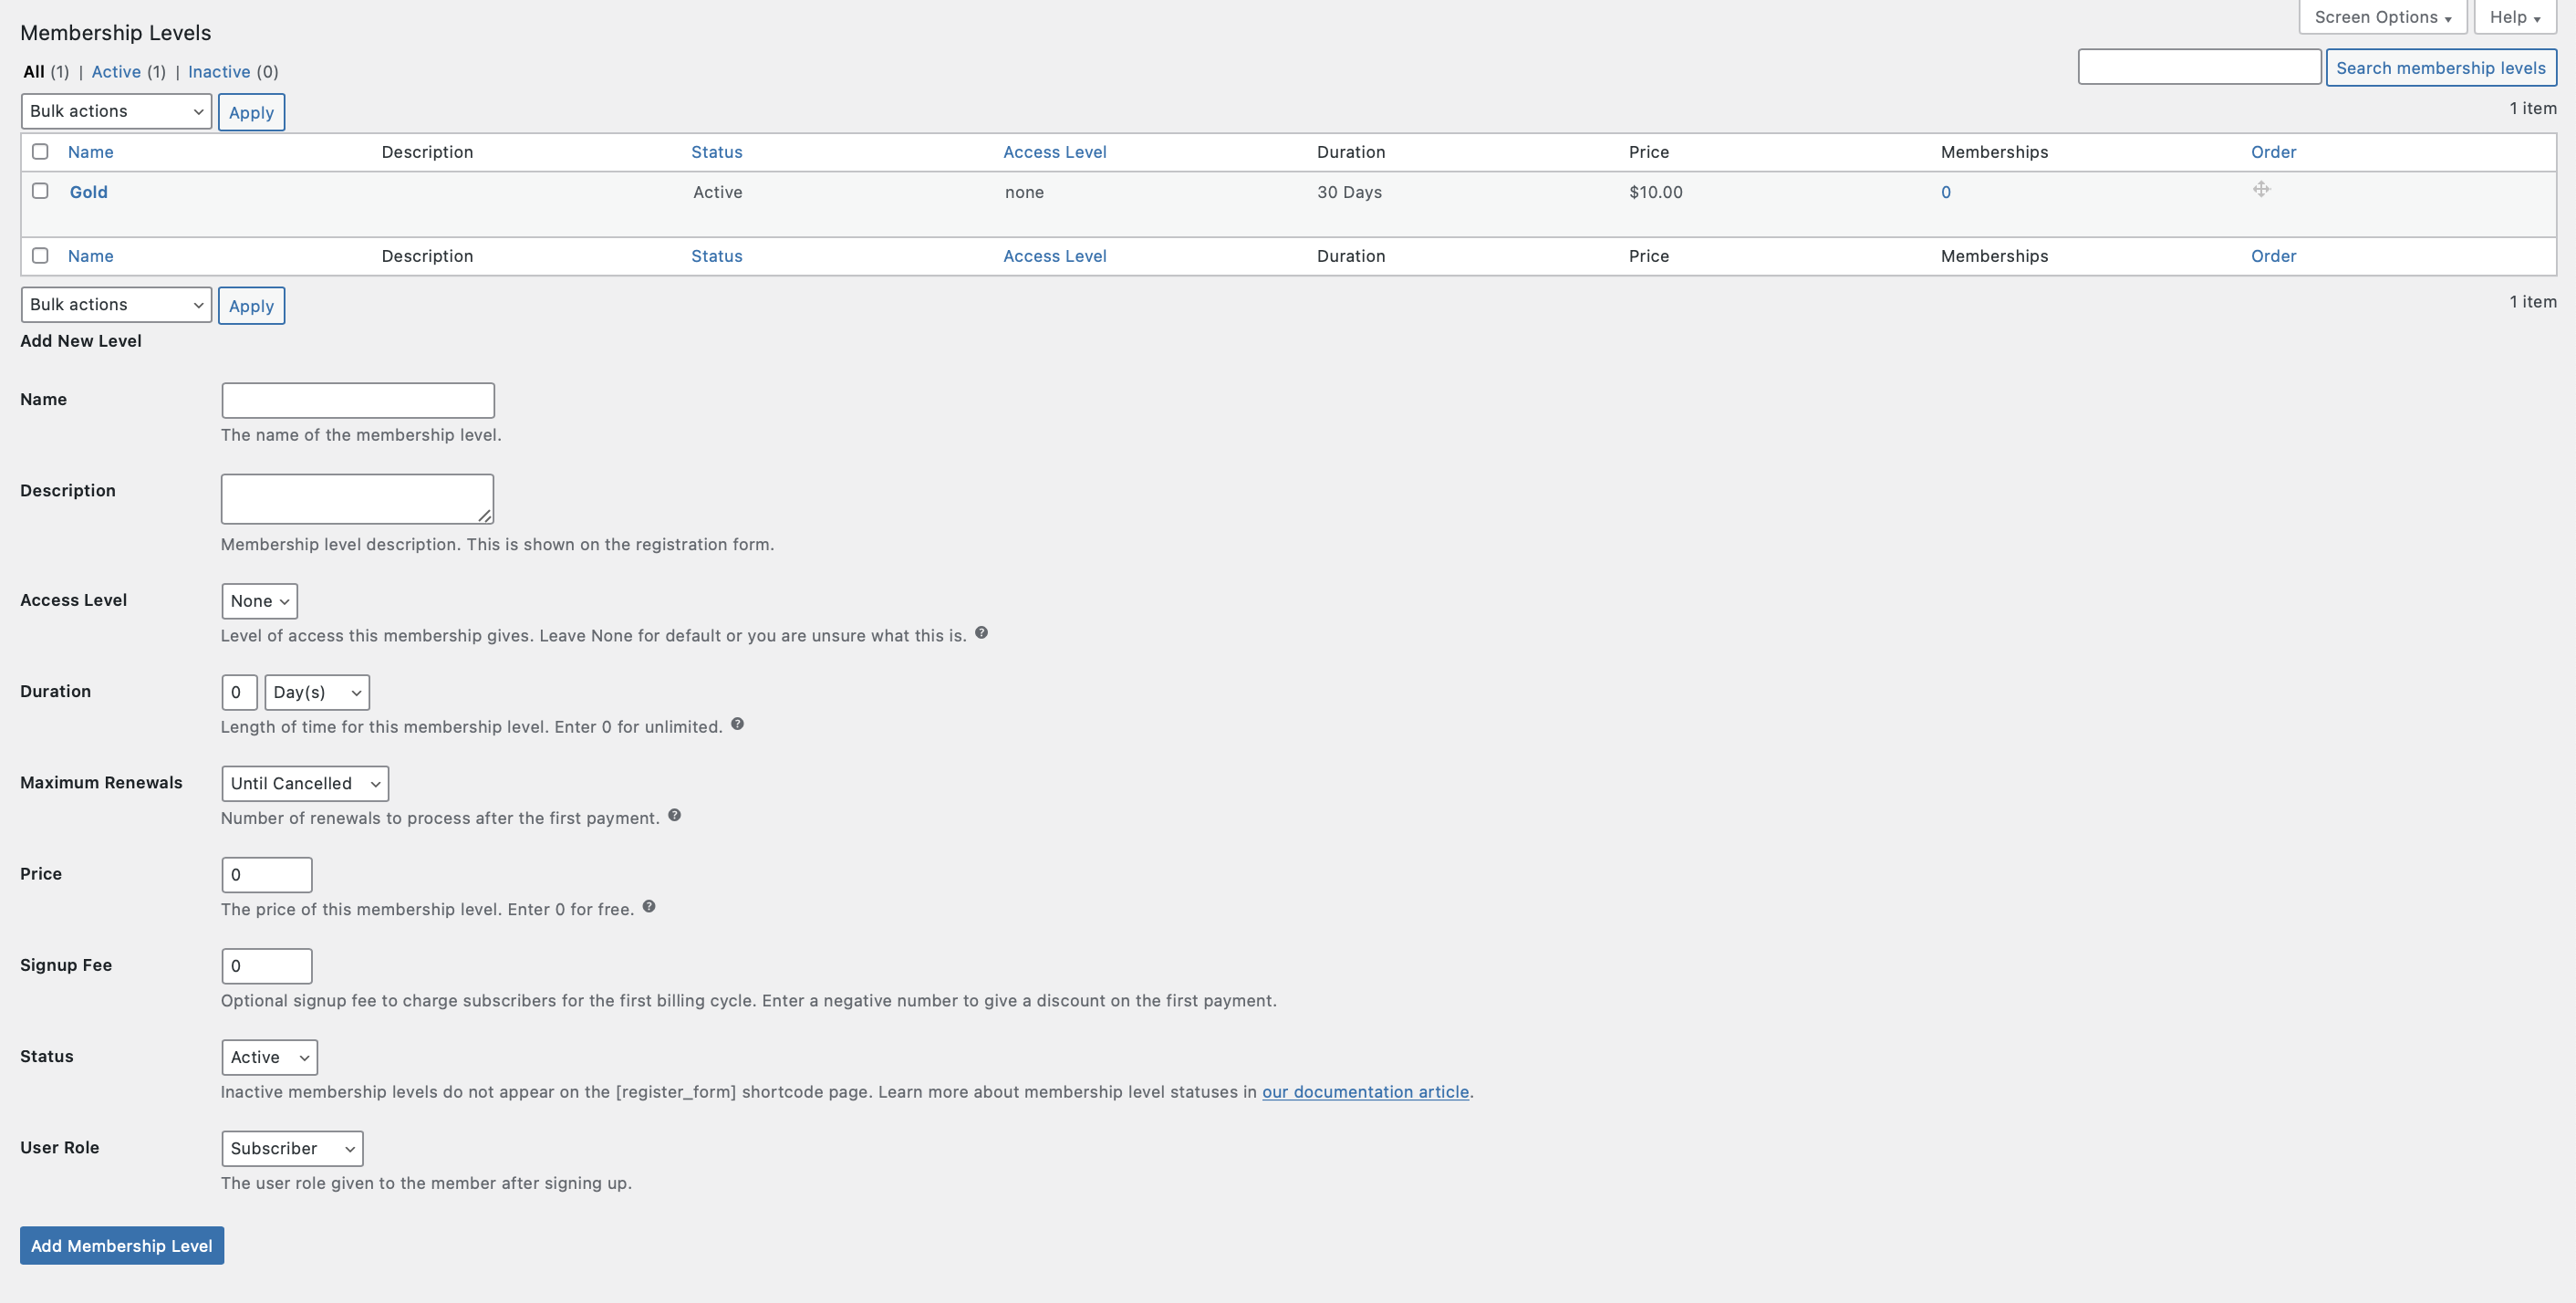
Membership Levels
Membership levels are how you group members together to grant them access to restricted content. These are configured in Restrict > Membership Levels. Some sites may only need a single membership level, while others may have numerous. It’s totally up to you!
Each level can have its own price, duration, access level, and role. How many you need depends on your business model and offerings.
For more information, please go to How to Create Membership Levels. Please note that the Free trials is restricted to Restrict Content Pro.
Restricting Site Content
This is where the magic happens! It’s time to pick which content you’d like to restrict and configure the settings. Restrict Content Pro lets you restrict content in various different ways.
Please click the links below to learn more about each restriction type:
- Restrict Posts, Pages, or Custom Post Types Individually.
- Restrict Content by Category or Other Taxonomy.
- Restrict a Portion of Post or Page Content with a Shortcode.
- Restrict Content in Template Files with PHP Code.
Tools
The Tools page has four different categories split into four tabs: System Info, Debugging, Import, and Export.

System Info
The System Info tab allows you to generate and download information specific to your installation that can be helpful to iThemes support should you need some assistance.
Debugging
The Debugging tab allows you to view and download log files for RCP processes.
Import
The Import tab allows you to import Membership and Payment information via CSV files.
For more information, please go to “Can I import Members from a CSV file.”
Export
The Export tab allows you to export Membership and Payment information via CSV.
For more information on exporting Members and Payment, please click the links below: