Group Accounts – Setup
The Group Accounts add-on for Restrict Content Pro lets you offer group accounts on your membership site. Group accounts, often referred to as umbrella memberships, allow group owners to invite other members to the site to share the same membership. The group owner can add, remove, and manage the members of the group. Billing is all handled by the group owner, meaning group members never need to enter any billing details or worry about the status of their accounts. The owner’s membership status controls the status of the group members. If the membership expires, all group members also expire.
Installing The Group Accounts Add-On
Download and install the plugin from your account dashboard here. If you need help installing the plugin, refer to the WordPress plugin installation documentation.
To license the plugin, please view our “How Do I License iThemes Products on My Sites” article.
Configuring The Group Accounts Add-On
Membership Levels
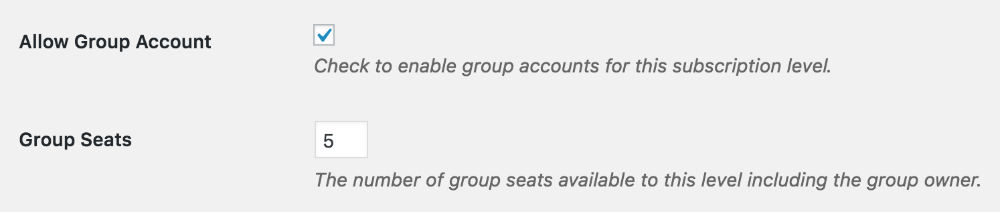
Group Accounts must be enabled on the membership level(s) whose members you want to have group seats with their memberships. To do that, go to Restrict > Membership Levels, and add a new membership level or edit an existing one. Enable the Allow Group Account option, specify the number of Group Seats allowed with the membership level, and save the settings.
 Email Settings
Next, you need to configure the email settings. To do that, go to Restrict > Settings > Emails and compose an email in the Group Invite Email section.
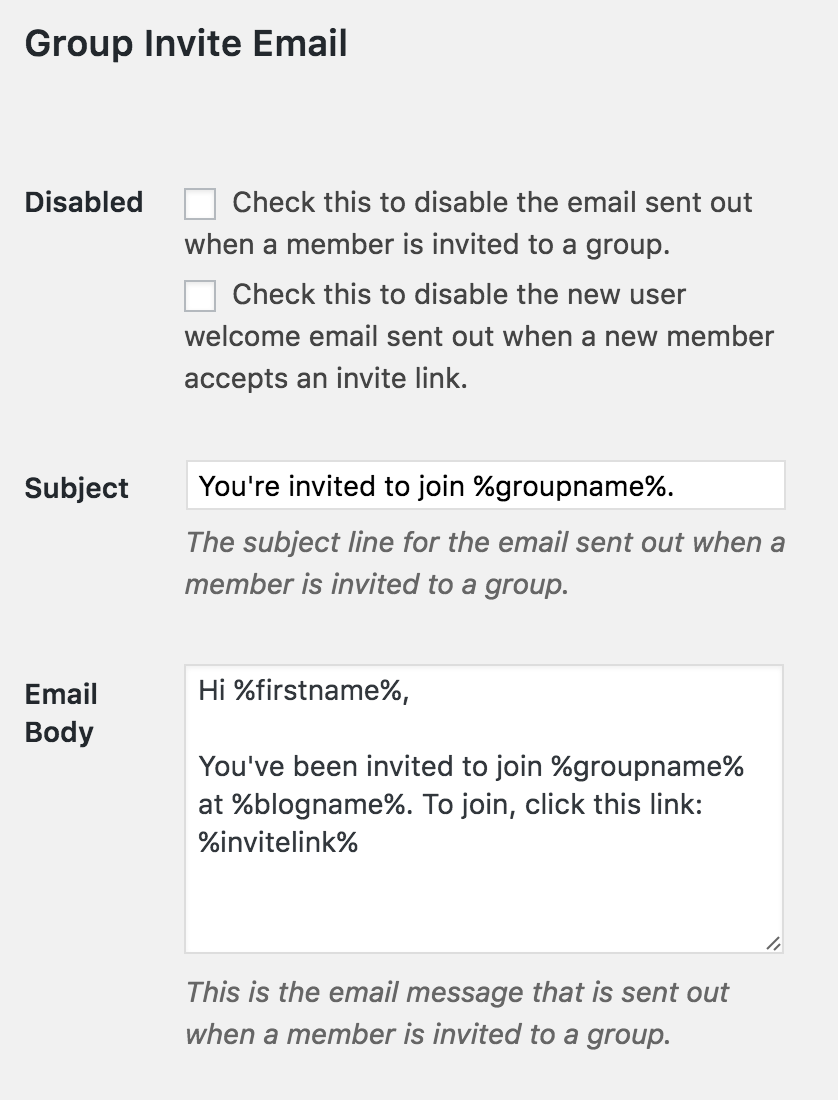
Note: Group Accounts includes three new email template tags for use in your emails. They are:
- %groupname% – displays the name of the group the person is being invited to.
- %groupdesc% – displays the description of the group the person is being invited to.
- %invitelink% – displays the invitation link the person being invited will click to join the group.
Here is an example email sent to someone that has been invited to a group:

Group Dashboard
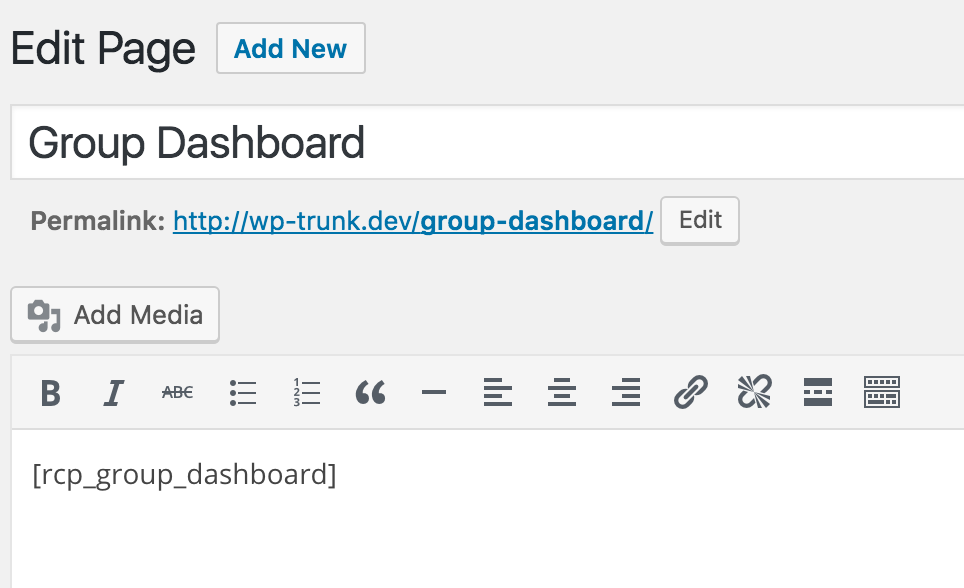
Next, you need to create a page where group owners can manage their groups. To do that, go to WordPress Dashboard > Pages > Add New, create a new page, add the [rcp_group_dashboard] shortcode to the page, and publish the page.
Optionally, if you want more control over the items that show on the group dashboard, you can use the separate shortcodes included. More on that here.
Have more questions? Submit a request