Installing Through FTP
To upload Restrict Content Pro through FTP, first connect to your website using your favorite FTP program. If you are not familiar with FTP programs, I recommend Filezilla.
If you do not have the FTP connection info for your website, it can be obtained from your hosting company’s control panel for your website.
Before connecting to your site’s FTP, download the .zip file for Restrict Content Pro from your purchase receipt and extract its contents. This will leave you with a folder called restrict-content-pro.
Once you are connected to your site via FTP, navigate to the wp-content/plugins/ directory and upload the restrict-content-pro folder. The final folder path will be wp-content/plugins/restrict-content-pro.
Once the folder is uploaded, log into your WordPress site, navigate to Plugins, locate Restrict Content Pro, and click Activate Plugin.
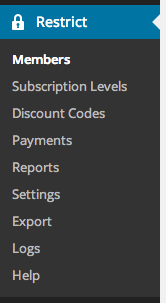
You will now have a menu item label Restrict near the bottom of the admin menu in WordPress.
You will also be presented with a notice that says you should configure the Restrict Content Pro settings. Click this link and proceed to Setting Up Restrict Content Pro.
