MailChimp Pro
Table of Contents
Setup
The MailChimp Pro add-on for Restrict Content Pro (RCP) will integrate your site with MailChimp, a powerful email marketing service that makes it very easy for you to communicate with and retain your customers. The Pro add-on provides numerous benefits over the free MailChimp add-on, including the ability to subscribe customers to different mailing lists based on their membership level, subscribe customers to your list automatically (without opt-in), track and record RCP membership status in MailChimp, and more.
This add-on requires a Professional or Ultimate Restrict Content Pro license key and a MailChimp account. You can get started with MailChimp for free.
Installing the MailChimp Pro add-on
Download and install the plugin from your account dashboard here. If you need help installing the plugin, refer to the WordPress plugin installation documentation.
To license the plugin, please view our “How Do I License iThemes Products on My Sites” article.
Configuring the MailChimp add-on settings
After installing and activating the plugin, you need to configure it so it can connect with your MailChimp account. The settings are located in Restrict > MailChimp Pro.
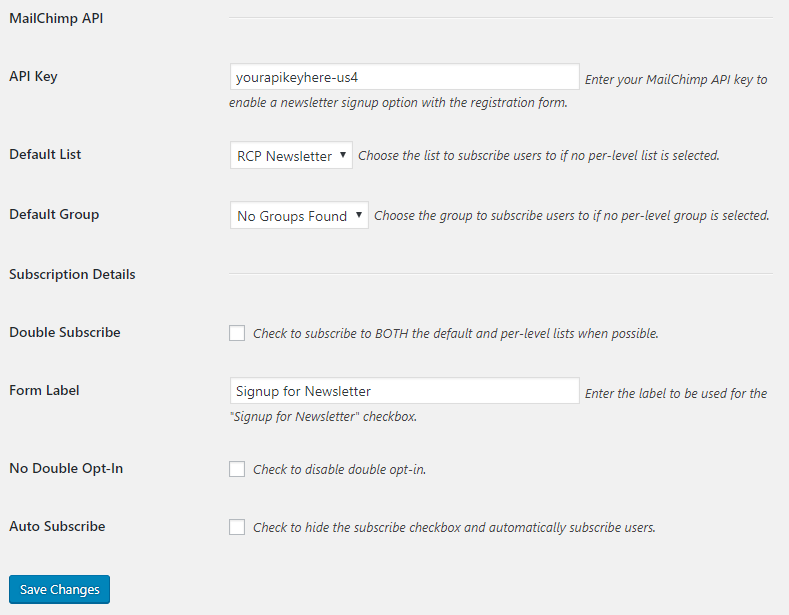
MailChimp API settings
In the API Key field, enter the API key found in your MailChimp account. You can find that under your account profile in your MailChimp account. If you do not have an API key already, you can create one.
After entering your API key, click the Save Changes button. The page will reload. Now you can select the Default List you want people to subscribe to when registering for a membership.
Once you’ve chosen your list, you may want to click Save Changes one more time in order to load the groups associated with your chosen list. You may then select a Default Group to add your members to.
Subscription Details settings
- Double Subscribe: When checked on, customers will be subscribed to both your chosen Default List and the list selected on the membership level itself (provided they are different lists). This is a good idea if you want to have one master list, then separate lists for each membership level. If this is unchecked then the customer will only be added to one mailing list: the list set for the membership level they signed up for. If a list isn’t set for that level, then they’re added to the default list.
- Form Label: This is the label that will appear on the registration form next to the opt-in checkbox.
- No Double Opt-In: If checked, double opt-in will be disabled. Your customers will not receive an email from MailChimp asking them to confirm their subscription to your list – they will simply be added automatically.
- Auto Subscribe: If checked, the “Form Label” and checkbox will not appear on your registration form; customers will be automatically added to your list and won’t have a choice to opt-out during registration.
Selecting a different mailing list for each membership level
In addition to choosing one Default List, you can also select different mailing lists for each membership level. Add or edit a membership level and you’ll find dropdowns for MailChimp lists and groups.
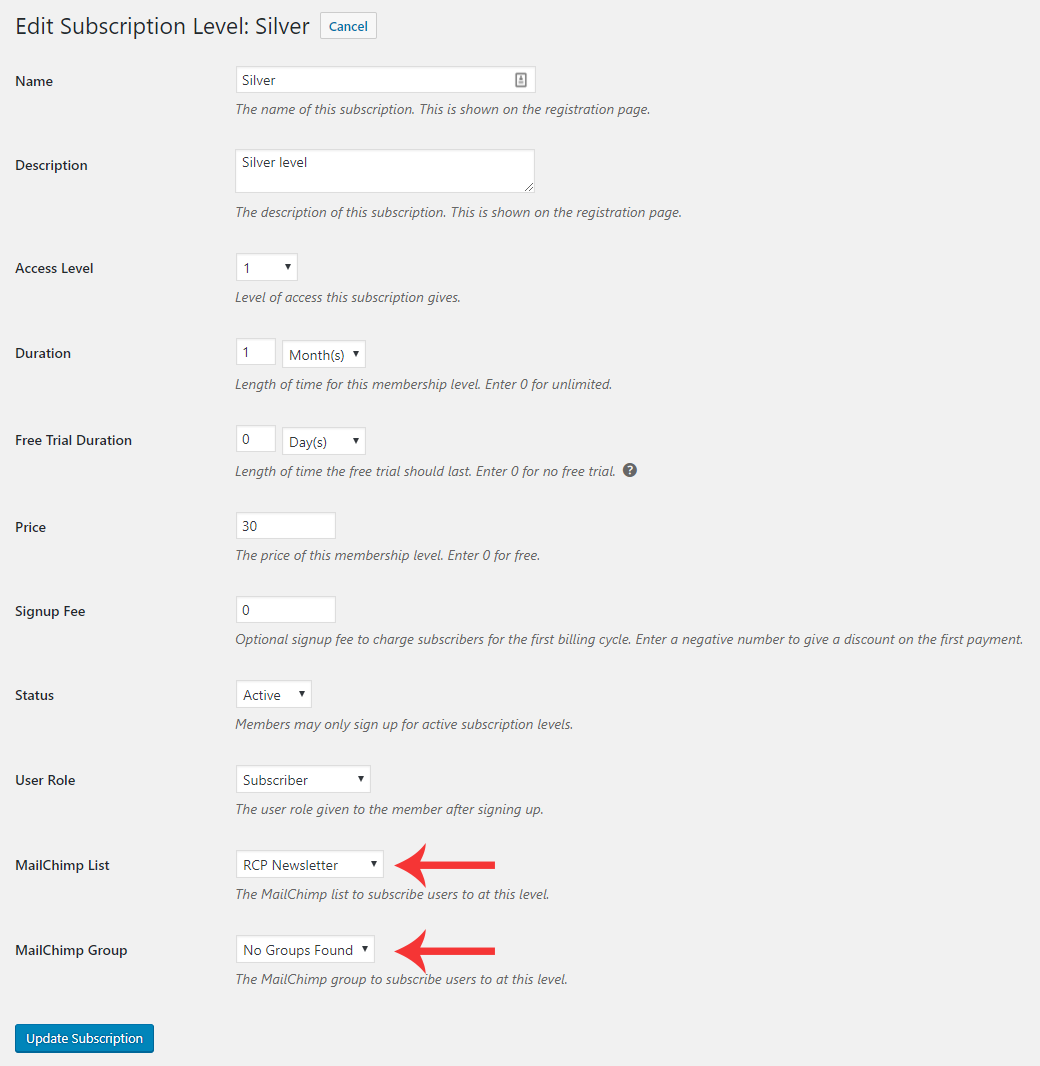
You can choose to use the global default option or customize these settings for each individual membership level.
How does it work with multiple memberships?
If a customer signs up for multiple concurrent memberships then they will be added to both lists/groups for the different membership levels. However, there will still only be one “STATUS” custom field in MailChimp. This value will be updated any time one of the membership statuses changes. For example: if both memberships are active, the STATUS value will be “active”. If one membership expires, the status value will change to “expired”.
Unsubscribe from the list when membership expires
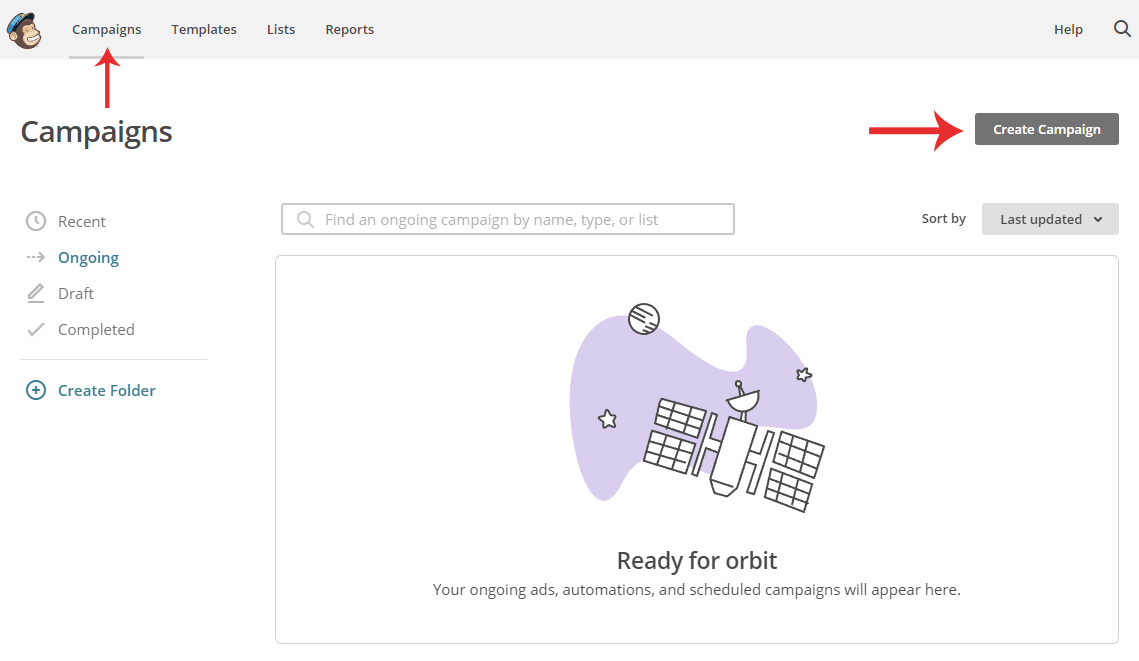
Using MailChimp’s automation, you can automatically unsubscribe users from your MailChimp list when their Restrict Content Pro membership expires. Follow these steps to set up an unsubscribe automation:
In MailChimp navigate to the “Campaigns” interface and click the button to “Create Campaign”.
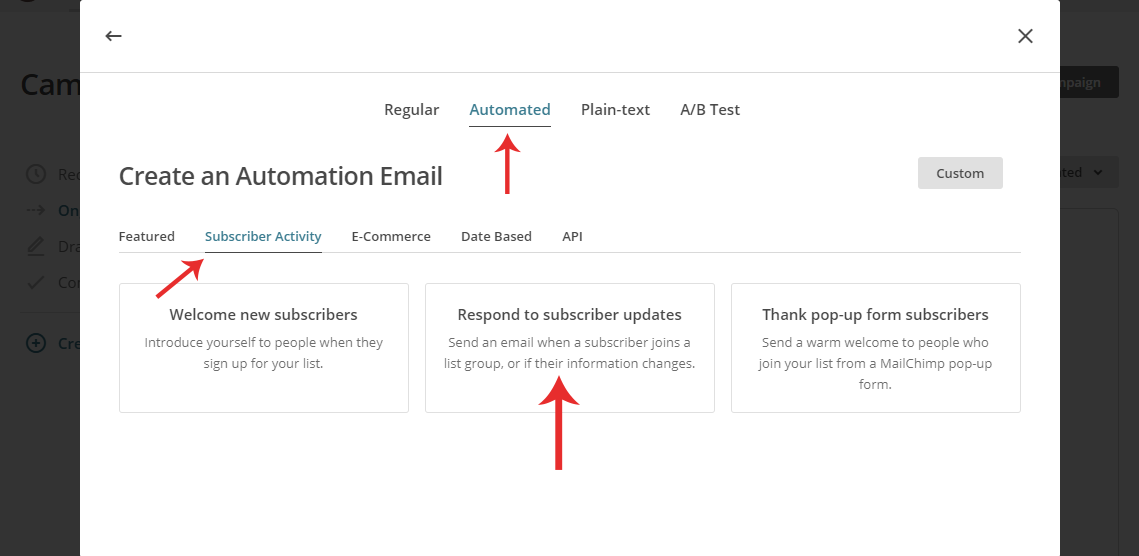
A window will pop up asking what you want to create. Select “Create an Email”, change the email type to “Automated”, select “Subscriber Activity”, then click “Respond to subscriber updates”.
On the next screen, change the trigger to “List field change” on the top right. You’ll also be able to choose a “Campaign Name” and choose which list you’d like to apply this automation to. Click “Begin” to proceed to the next page.
By default, MailChimp will automatically configure three triggers for you. You probably only need one, so you can delete two of them by clicking the downward-pointing caret on the right and select “Delete Email”.
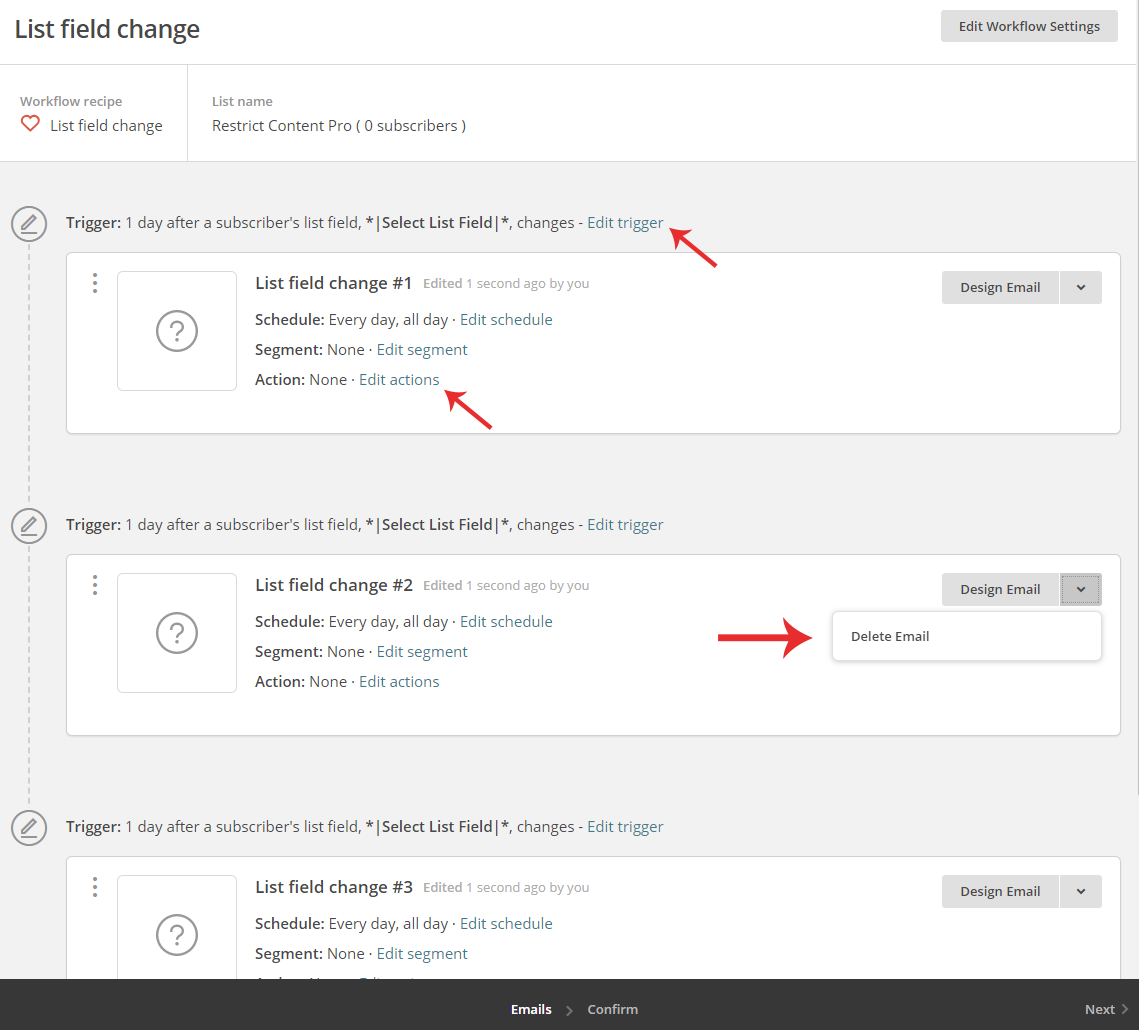
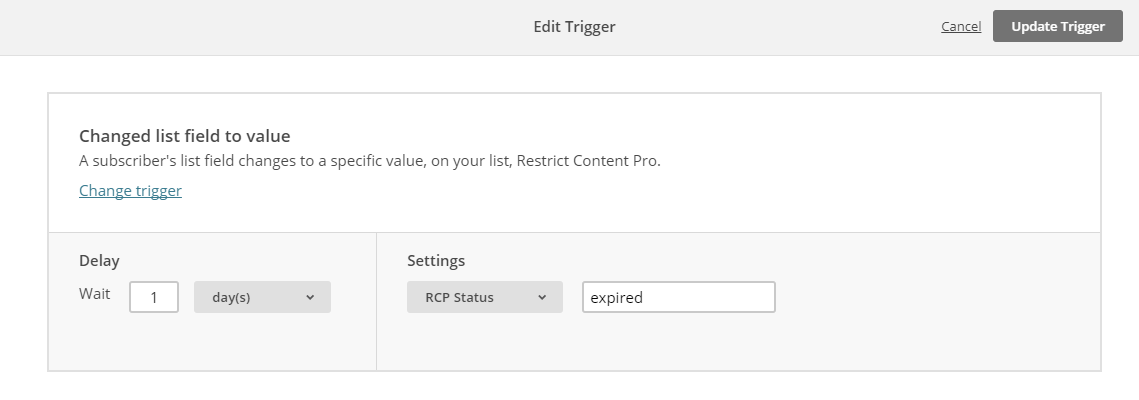
Once you have the email you’d like to keep, you’ll need to click “Edit Trigger” so you can specify which field you want MailChimp to watch for changes. Click the dropdown to “Select List Field” and choose “RCP Status”. Then in the box, you can enter the status you want to act on, in this case, “expired”, as we’ll be unsubscribing users when their Restrict Content Pro membership expires. Then click “Update Trigger” to save your changes.
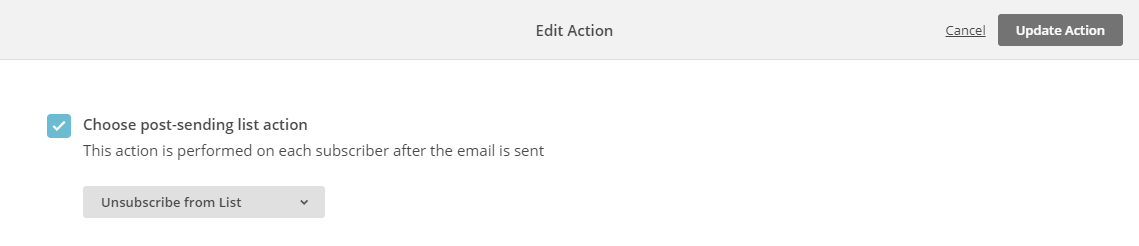
Next, you’ll want to configure the action for MailChimp to take. Click the link to “Edit actions” and select “Unsubscribe from list”. Click “Update Action” to save your changes.
Finally, click “Design Email” to configure the email to be sent to the subscriber. This email can contain anything you like, but it might be a good idea to notify them that they’ve been unsubscribed, and/or that their membership has expired.
Here’s what the final automation looks like:
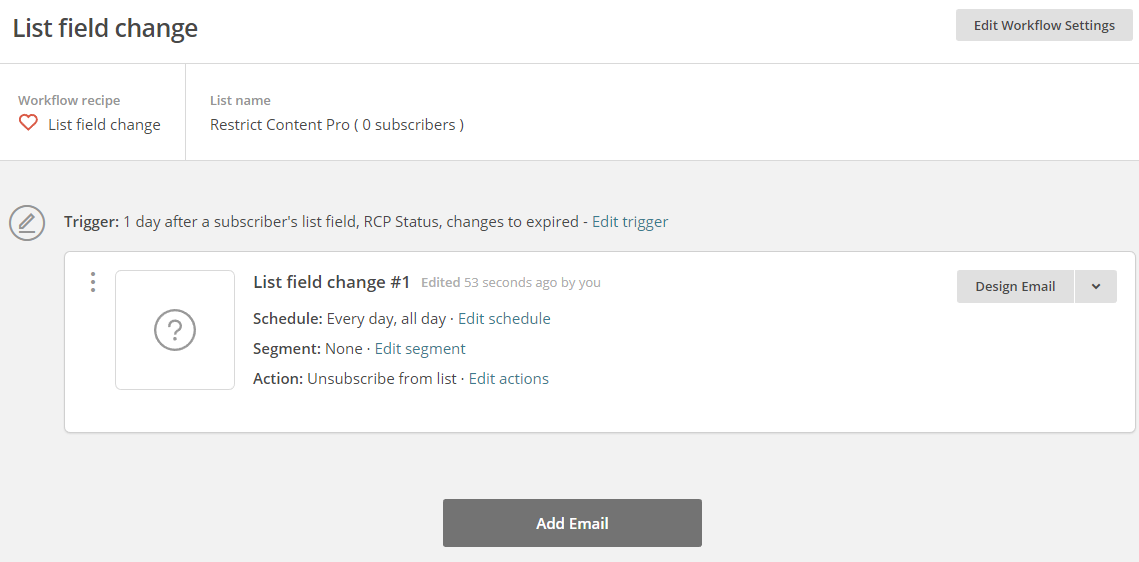
Click “Next” in the bottom right to confirm your settings and activate the automation.
Troubleshooting groups not appearing in list
If you create a brand new group in MailChimp it may not immediately appear in the RCP MailChimp Pro settings. This is because the group list results are cached for one day to avoid querying MailChimp on every page load.
You can forcibly delete the cache now by installing the plugin Transients Manager. Once installed, go to Tools > Transients and search for a transient starting with “rcp_mailchimp_pro_list_groups_”. In the results, the list ID will be appended to the transient name. You can delete any results starting with “rcp_mailchimp_pro_list_groups_”. This will force the plugin to fetch new values.
Have more questions? Submit a request