[restrict]
While you can restrict entire pages, posts, and even post types and categories using Restrict Content, there may be times when you’d like to restrict just a part of the content on a screen, making it visible for certain users.That’s where the [restrict] shortcode comes in!
Before you get started:
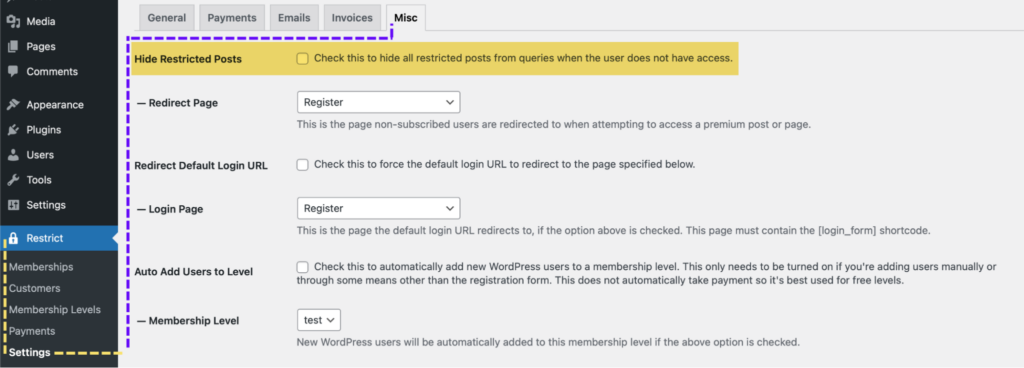
In Restrict > Settings / Misc, make sure the Hide Restricted Posts checkbox is not checked.
Next, in WordPress > Settings > General, make sure your New User Default Role is set to Subscriber.
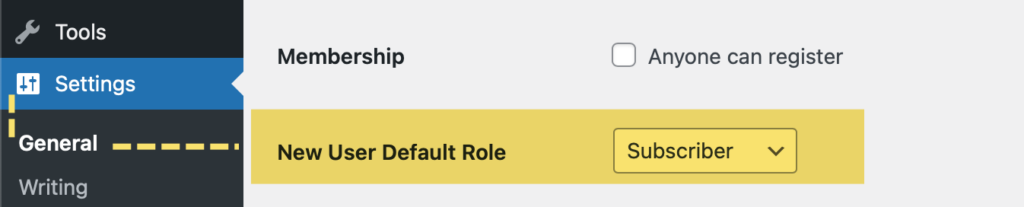
Note: It’s not necessary to enable the “Anyone can register” option, as Restrict Content handles registration permissions for you.
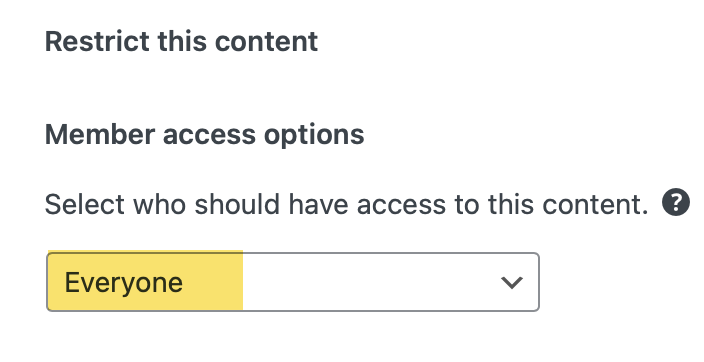
The last thing to check is on the page or post where you’ll be using the shortcode – you want to make sure the Member access options box, visible at the bottom left of your screen, is set to Everyone.
Restricting Content
In the simplest form, you can use the shortcode like this:
Example:
[restrict] Your members-only content goes here.[/restrict]If nothing else is added to the shortcode to specify otherwise, any Restrict Content Customer will be able to see the content.
Sometimes, though, you’d like to have a specific message shown to people without access, or allow some, but not all, of your members to view the content.
The [restrict] shortcode accepts the following parameters:
Parameters:
message – You can define what your visitors see if they are not logged in, or do not have access to the particular restricted content.
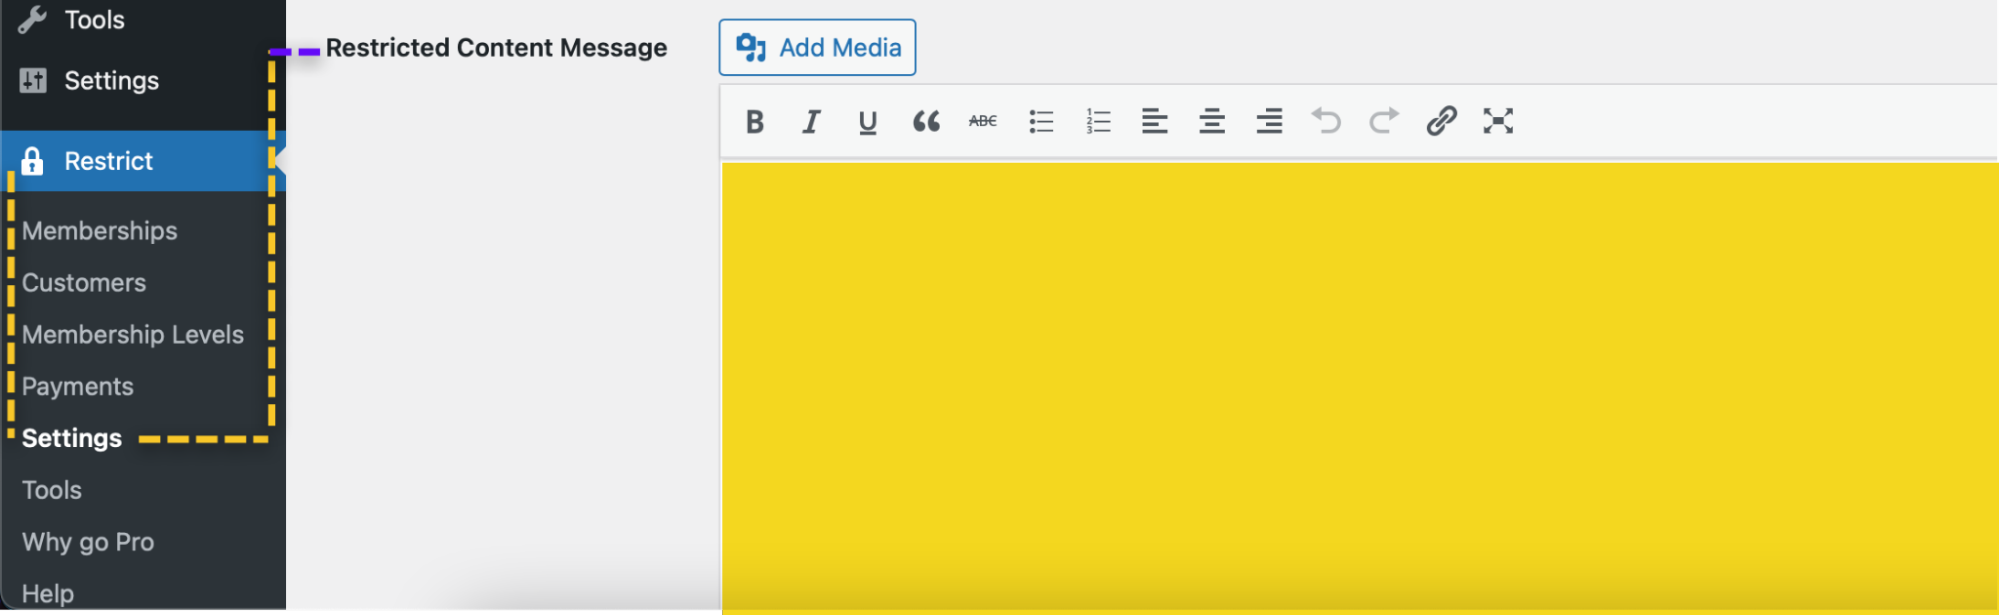
Note: This message, by default, says “This content is restricted to subscribers” and can be adjusted globally in Restrict > Settings / Restricted Content Message. Use the “message” parameter in the shortcode if you’d like to adjust it for an individual instance.
Example:
[restrict message="Got FOMO? Never miss a thing when you <a href='LINKTOREGISTER'>sign up here!</a>"]Content you want to show to registered members can go here, if you like.[/restrict]Note: It’s important to use double quotes around the message, and single quotes around the link itself, in order for the link to work.
If you don’t want any logged in users to see the registration nudge, you can also use the shortcode [not_logged_in] to create content that only shows to non-members. When using this parameter, use a Custom HTML block instead of a Shortcode block.
paid – If you offer a mixture of free and paid memberships, you can permit only paying members to access the content. The options are true or false.
Note: If you want all members, paid and free, to see the content after logging in, you don’t need to use this parameter, as it’s set to false by default allowing all members to access the content.
Example:
[restrict paid=”true”]Members who have paid for any membership will see the content, while Free customers will not.[/restrict]level – the Membership Level required to view this content
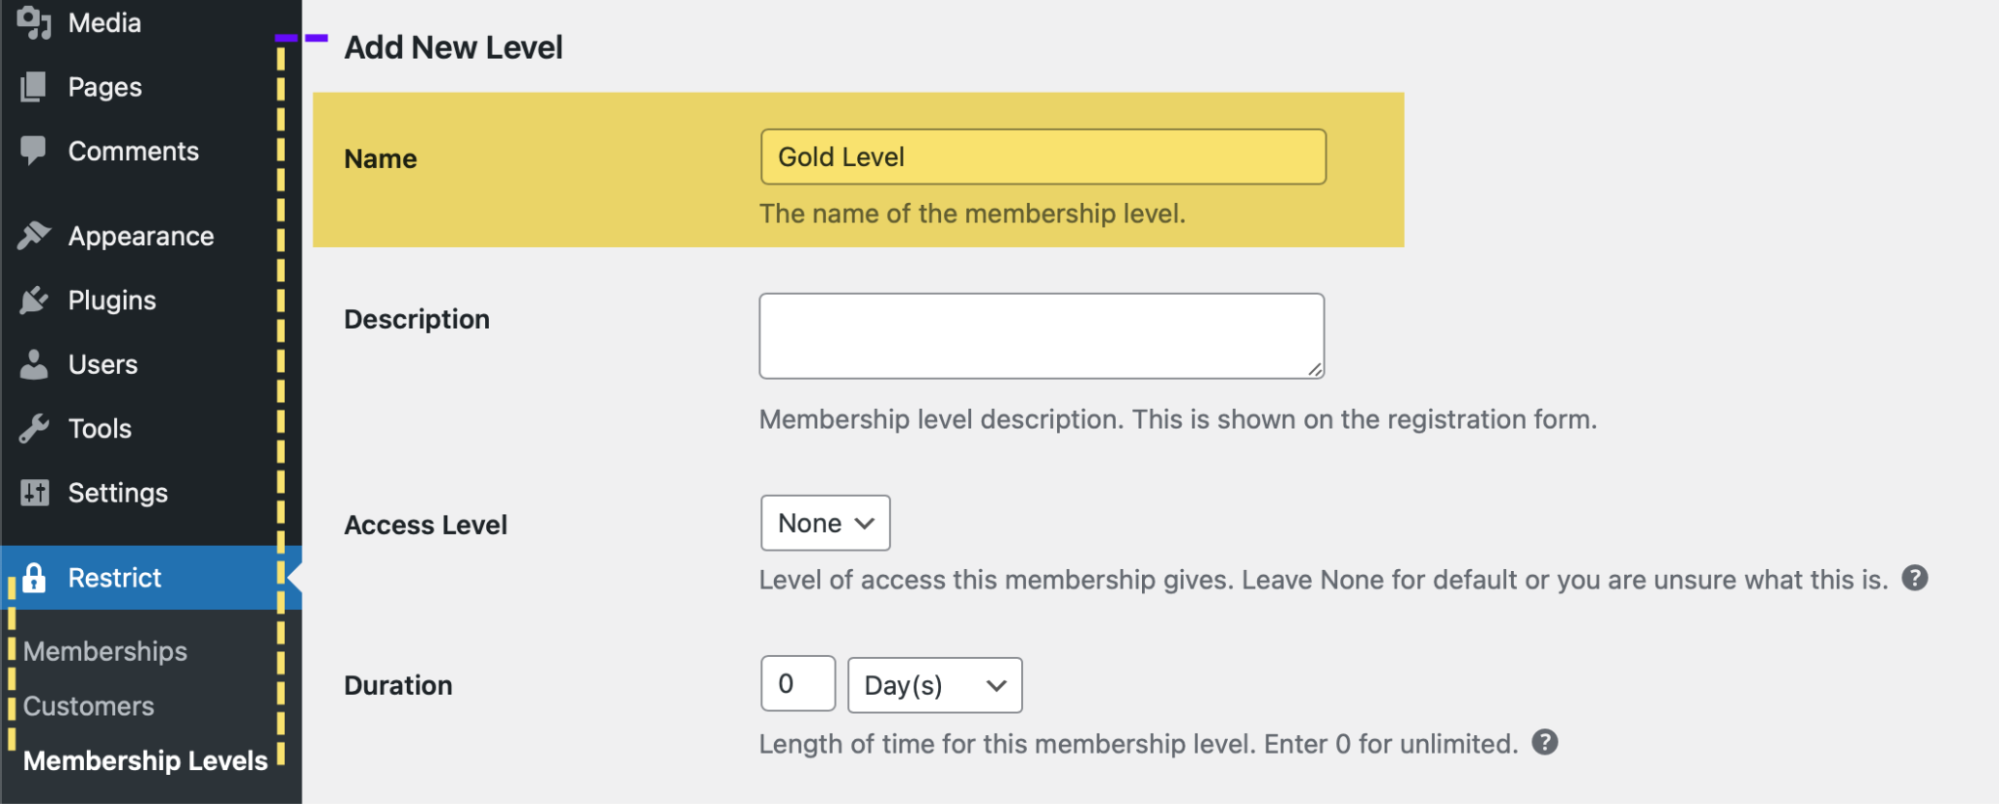
Note: In Restrict > Membership Levels > Add New / Name, you will set the Membership Level name that can be used in the shortcode.
Example:
[restrict level=”Gold Level”] Content for Gold members goes here.[/restrict]This parameter accepts the Access Level ID, as well.
We highly recommend using this method, instead of the Membership Level Name, as it offers better control over how you grant access, and isn’t affected if you change Membership Level Names.
How to set an Access Level
When creating a Membership Level, you can set an Access Level in Restrict > Membership Levels > Add New.
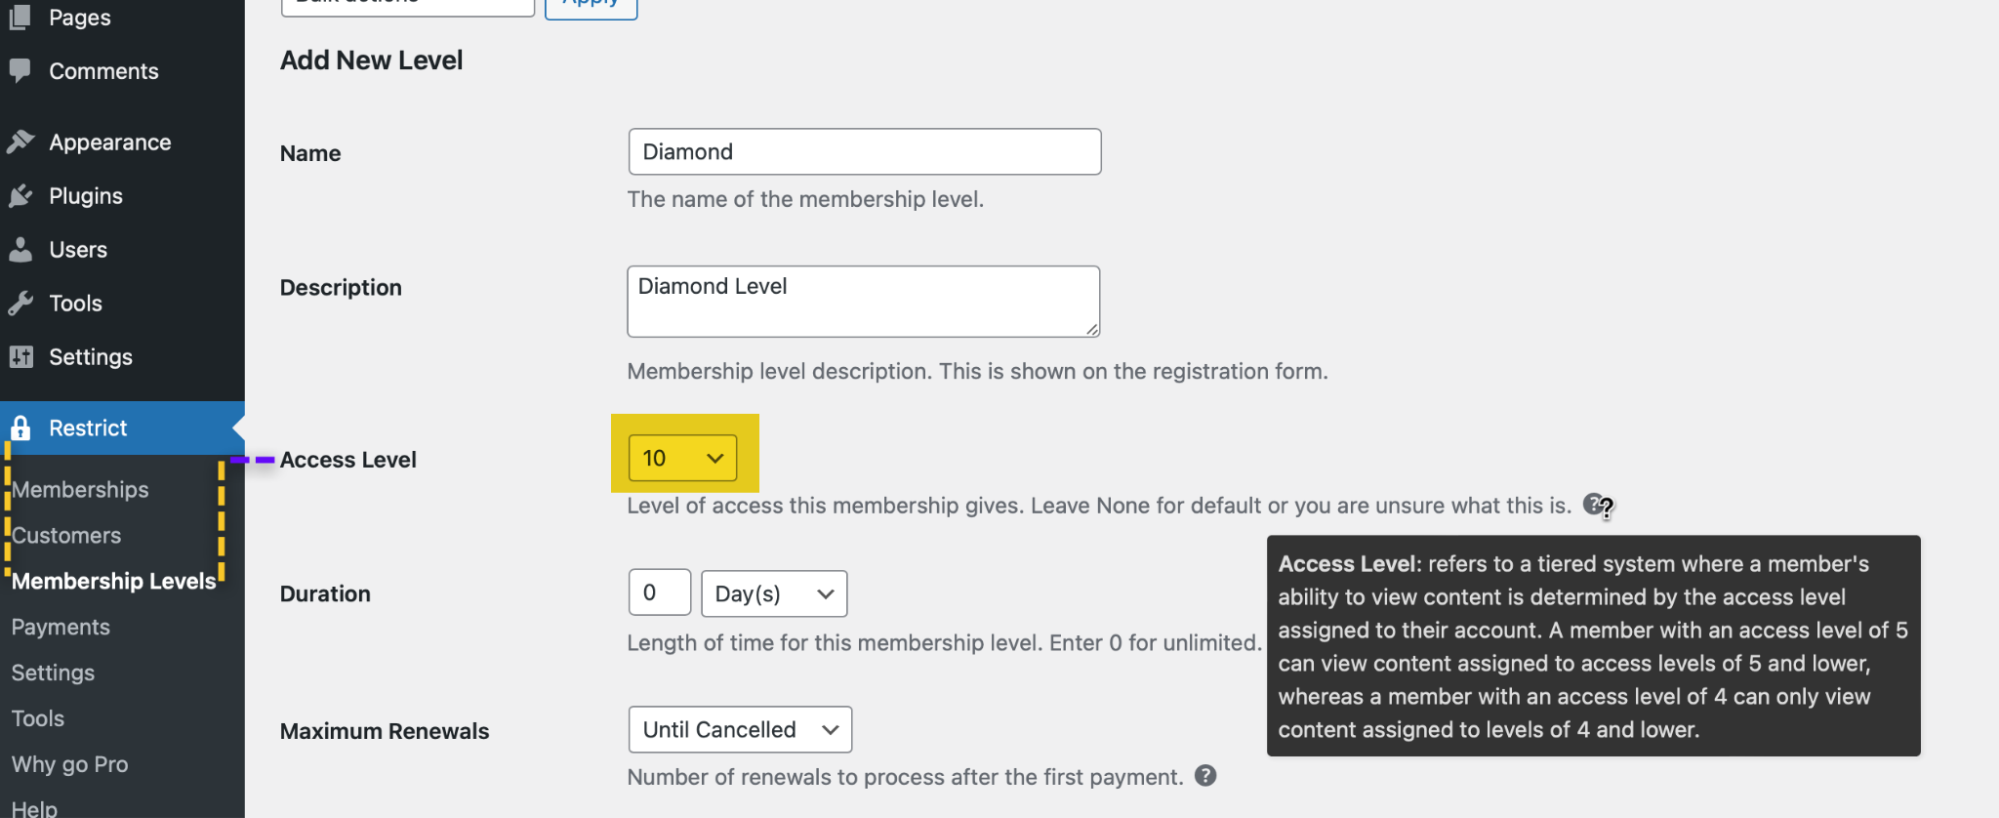
The Access Level is a handy way to grant escalating privileges to your customers, based on their subscription level. Someone with an Access Level of 10 will be able to see all content, whereas someone with an Access Level of 5 can only see content for Access Levels 5 and lower.
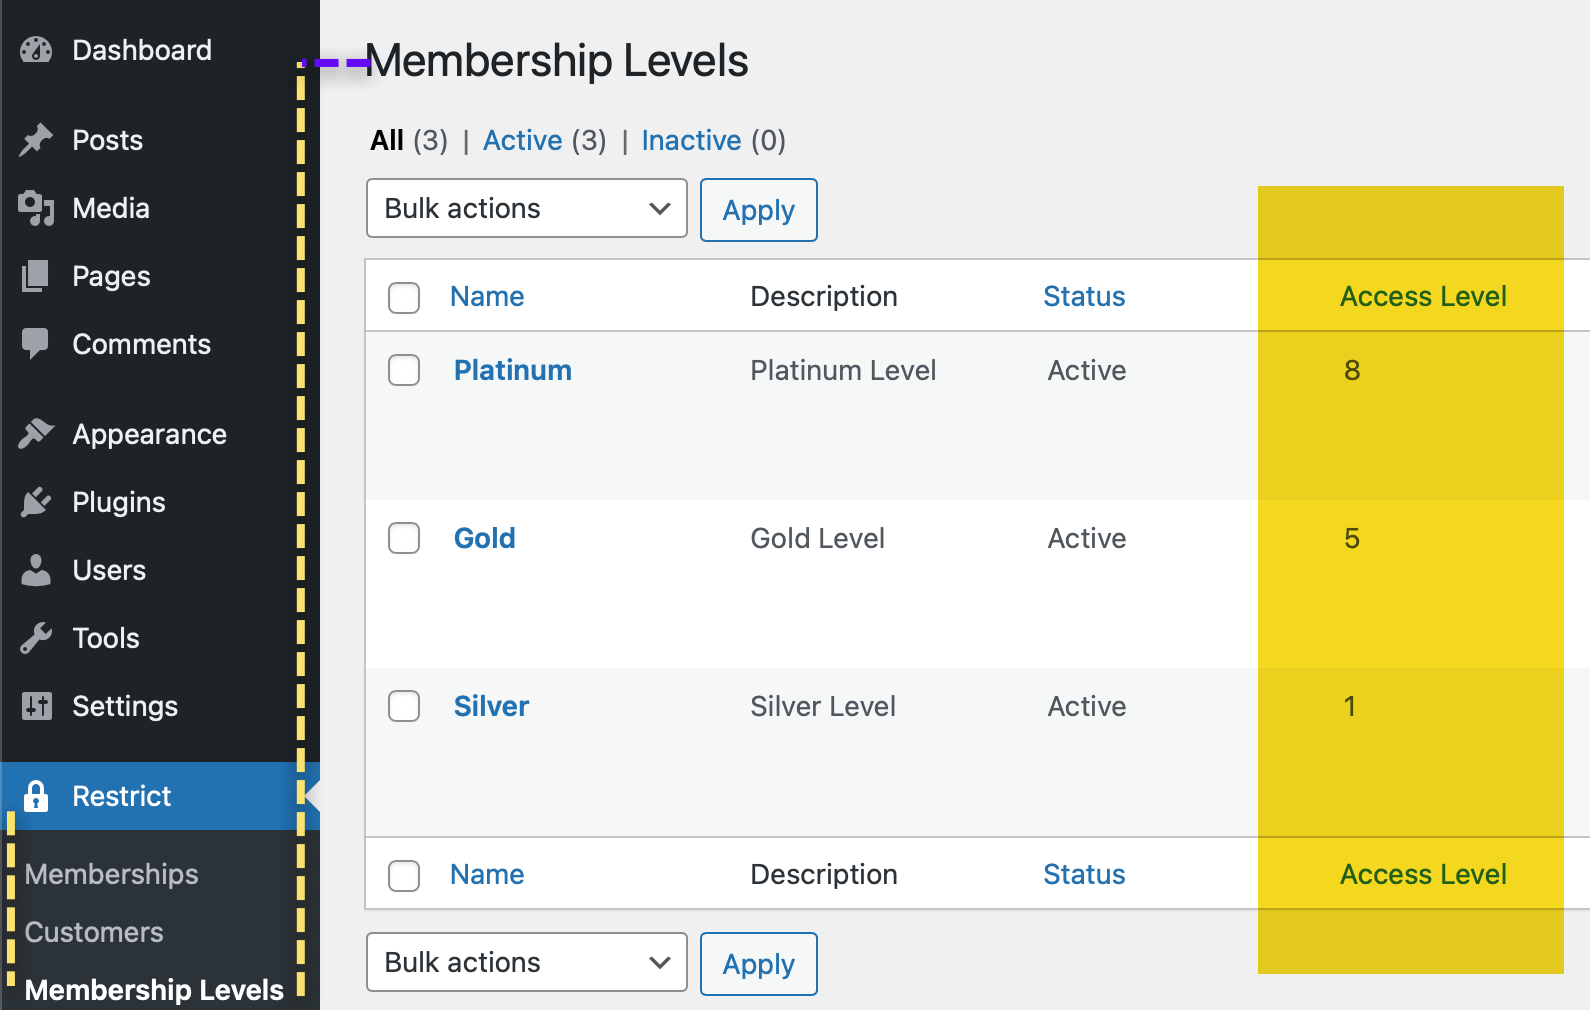
Note: You can view your Access Levels at any time by going to Restrict > Membership Levels and looking in the Access Levels Column.
Example:
[restrict level=”8”]Platinum members can see content for all Levels. Gold and Silver can not see this content.[/restrict]Example:
[restrict level=”5”]Gold members can see content for Gold and Silver Levels. Silver can not see this content.[/restrict]Example:
[restrict level=”1”]This content can be seen by all levels.[/restrict]subscription – the Membership Level ID(s) users must have access to in order to view this content.
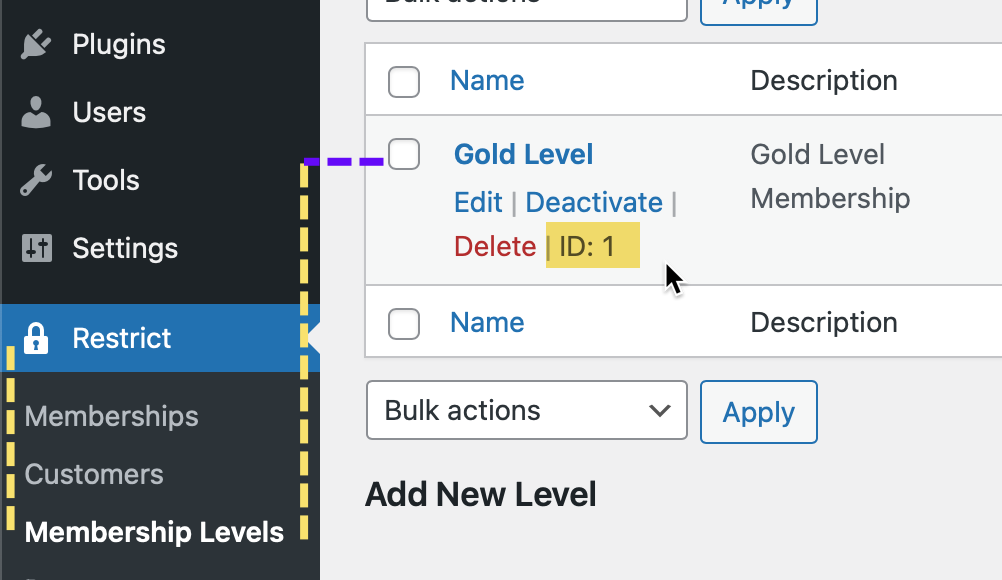
Note: To locate the subscription Membership Level ID(s), go to Restrict > Membership Levels, and hover over the membership you need the ID for. The ID will then appear.
Example:
[restrict subscription=”1”]Content for membership level 1 goes here.[/restrict]Note: The primary use case for this instance is when you want only one membership level to see certain content – perhaps an upgrade offer, or a new paid membership, just for them. One advantage to using the subscription parameter with the Membership Level ID instead of the level parameter with Membership Level name is that changing Membership Names will not change their ID.
You can add additional Membership Level IDs, separated by a comma, to make the content viewable to more than one level. By default, only the specific Membership Level ID(s) will be able to view this restricted content.
Example:
[restrict subscription=”1,5”] Content for Membership Level IDs 1 and 5 goes here. Levels 2, 3, and 4 will not see this content.[/restrict]userlevel – the user role(s) that can view this content. This accepts any WordPress User Role name, including custom roles. You can enter a comma-separated list to grant access to multiple roles.
Examples of roles include:
- none – all user roles – default
- administrator
- editor
- author
- contributor
- subscriber
Note: When using this parameter, all user roles must also be Restrict Content customers, or have a membership subscription. In most cases, restricting by access level is the preferred way to set up the shortcode for ease of use.
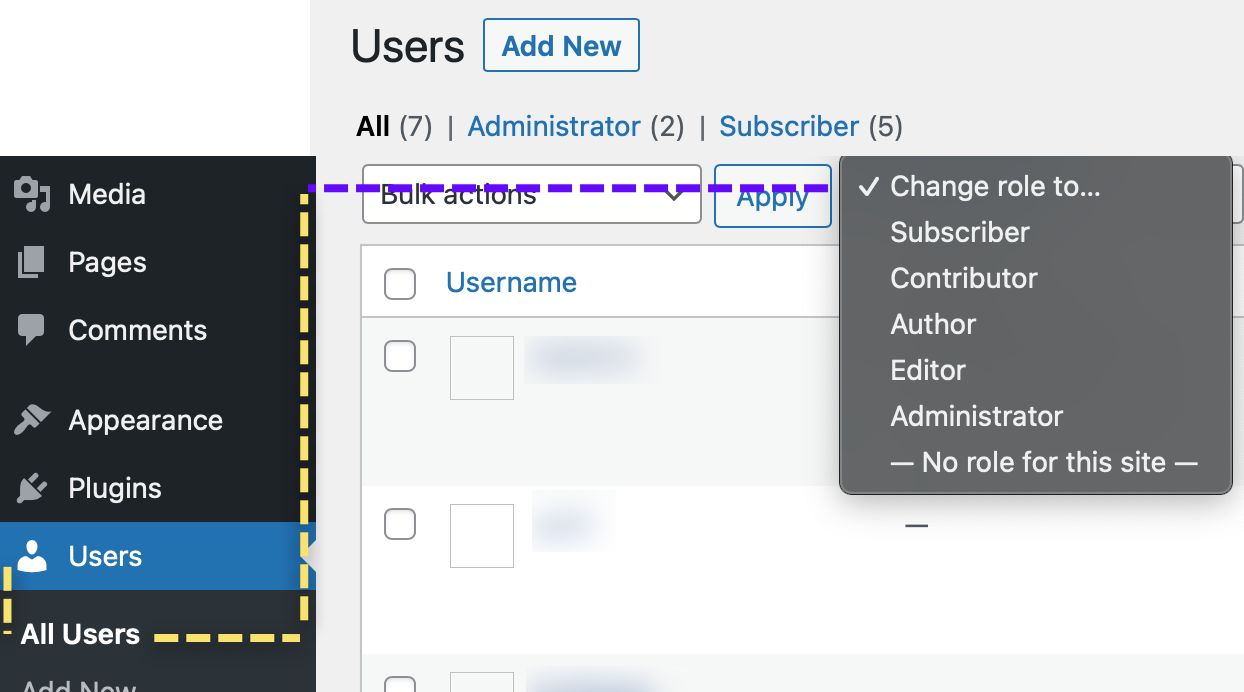
Finding User Roles:
In your WordPress Dashboard, go to Users > All Users. There you can see the current roles assigned to your users, and also change specific user roles if you wish.
Example:
[restrict userlevel=”editor”] Content for the Editor User Role.[/restrict]Example:
[restrict userlevel=”author,editor”] Content for the Author and Editor User Roles.[/restrict]
Have more questions? Submit a request