Restriction Timelock
The Restriction Timelock add-on allows site admins to make pages publicly available to all users, but specify a date and time in the future when the content will become restricted automatically.
Installing The Restriction Timelock Add-On
Download and install the plugin from your account dashboard here. If you need help installing the plugin, refer to the WordPress plugin installation documentation.
To license the plugin, please view our “How Do I License iThemes Products on My Sites” article.
Configuring The Restriction Timelock Add-On
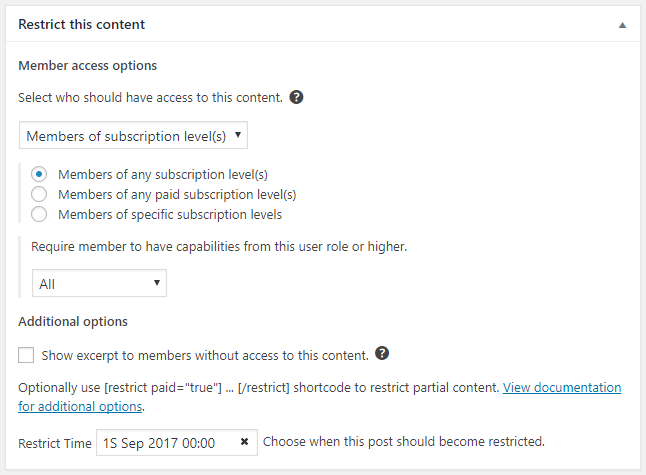
Once the add-on plugin is installed and activated, a date and time field will be added to the Restrict this content metabox.
To schedule restrictions for a page, navigate to the edit screen for that page and then locate the Restrict this content metabox.
First you will want to set up the restrictions you want to schedule to activate in the future, for example: set the dropdown to “Members of subscription level(s)” and then select “Members of any subscription level(s)”.
Then look at the bottom of the metabox for a new field called “Restrict Time”. Click into the field and a calendar and time picker will be displayed. Simply select the date and set the time of day or night that you wish for the restrictions to be activated. Once chosen, the page will be publicly accessible to all guests, until the date you’ve selected has past. At that point, the restrictions you’ve chosen will kick in and only members who meet the criteria will be able to view the content.
Have more questions? Submit a request