A Beginner’s Guide to the Free Restrict Content WordPress Plugin
The new, improved, and FREE Restrict Content plugin puts you in control of who can access premium content on your WordPress site. With powerful content restriction options and the ability to sell memberships with access levels, you get everything you need to sell premium content in one easy-to-use plugin.
In this guide, we’ll help you walk through the process of installing the plugin and building your first membership level.

Installing the Restrict Content Plugin
To start building your Restrict Content Membership Website, you’ll need to download the free Restrict Content plugin. You can do this from the WordPress.org site or directly within your WordPress Admin by clicking the ADD NEW tab of the PLUGIN section in the sidebar.

Key in RESTRICT CONTENT into the search bar.

Choose WORDPRESS MEMBERSHIP PLUGIN – RESTRICT CONTENT by iThemes by clicking the INSTALL NOW button.

Once you install the Restrict Content plugin, the button will change colors and will now say ACTIVATE. Click the ACTIVATE button so you can begin working in Restrict Content.

Once you’ve activated the plugin, you will receive a welcome message.

You’ll also notice a new tab within your WordPress admin dashboard.

Click on the RESTRICT tab to begin accessing all of the powerful options now available in the free Restrict Content plugin.
Add Your Membership Levels
Restrict Content Pro allows site administrators to create any number of membership levels that customers can register for. Membership level options are displayed on the registration page and customers can select the one they wish to purchase.
Each membership level can be given a price, an optional signup fee (one-time amount), an optional trial period, a frequency and period, and a user role that will be assigned to members when they register.
You will start the process of building your membership site by choosing MEMBERSHIP LEVEL within the RESTRICT tab.

All you need to do is fill in the sections and then click the ADD MEMBERSHIP LEVEL button.
Repeat the process for all of the levels you have determined for your membership website.
Creating Restricted Content
Creating content in your new membership site is as simple as ever. To restrict the new content to certain levels, scroll to the RESTRICT THIS CONTENT section of the POST page.
Here are a few ways Restrict Content Pro gives you powerful content restriction options:
- Restrict posts, pages and most custom post types. At the bottom of each page or post, you’ll find content restriction settings. You can also choose to restrict all pages or posts.
- Restrict categories and tags. From the Categories and Tags pages, you’ll find content restriction settings. You can also choose to restrict all categories or tags.
- Restrict specific parts of your content. Limit access to certain parts of your content with a shortcode, like
[restrict]This content is limited to logged in users.[/restrict]. - Restrict by logged-in users only. Restrict Content enables you to restrict access to your content to logged-in users only.
- Restrict by WordPress user role – Use the default WordPress user roles of Administrator, Editor, Author, Contributor, or Subscriber to restrict content.
- Restrict by membership level – With Restrict Content Pro, you can add unlimited membership levels to use to restrict content. A membership level refers to a membership option you can set up in the Restrict Content Pro plugin. For example, you might have a Gold, Silver, or Bronze membership level.
- Restrict by access level – Restrict Content Pro allows you to set up access levels (1-10). Access Level refers to a tiered system where a member’s ability to view content is determined by the access level assigned to their account. For example, a member with an access level of 5 can view content assigned to access levels of 5 and lower.
Restrict Content Pro allows site administrators to create any number of membership levels that customers can register for. Membership level options are displayed on the registration page and customers can select the one they wish to purchase.

Each membership level can be given a price, an optional signup fee (one-time amount), an optional trial period, a frequency and period, and a user role that will be assigned to members when they register.
Choose the member level or the access level that you want for the new content. If you want anyone to be able to access the content then there is no need to change any of the settings.
Activating the Free Stripe Payment Gateway
Restrict Content includes integration with Stripe, the incredibly popular and easy-to-use payment gateway. A payment gateway allows you to collect payments and monetize your restricted content securely.
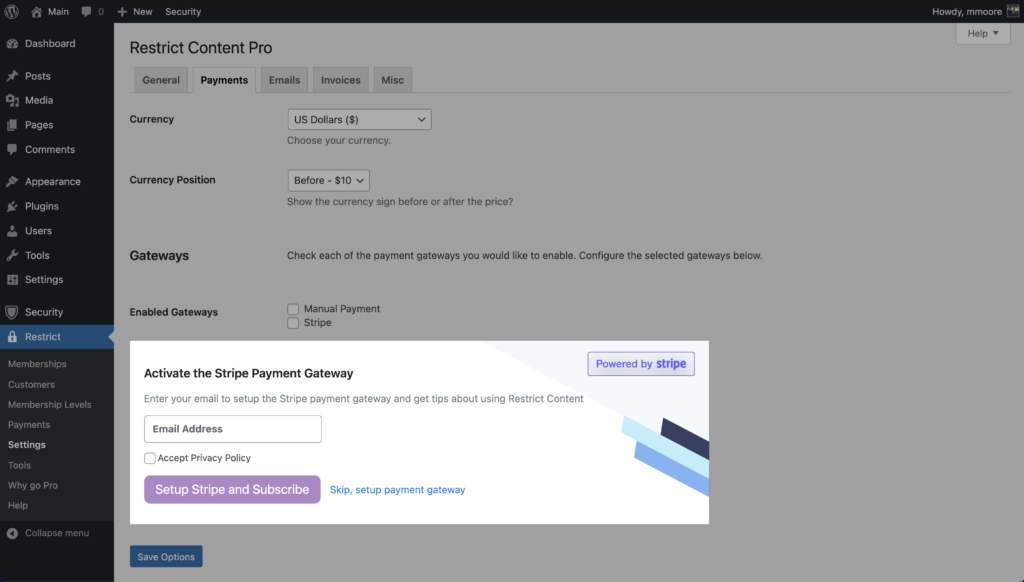
Navigate to the Restrict Content Settings and click on the Payments tab to start collecting payments.

Next, enter your email address and click the Setup Stripe and Subscribe button.
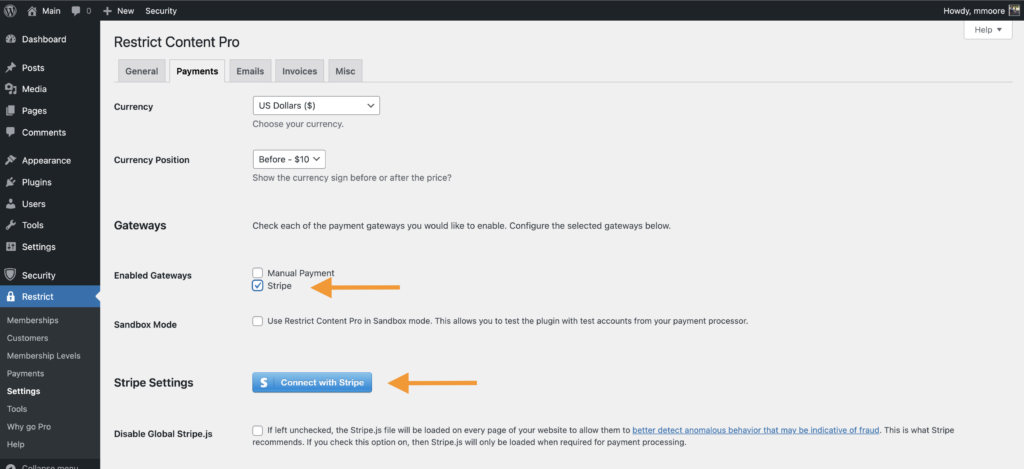
Now you can enable and connect to your Stripe account.
Note: The Restrict Content Stripe payment gateway integration includes an additional 2% processing fee. You can remove the processing fee by upgrading to Restrict Content Pro.
More Membership Power with Restrict Content Pro
The free version of the Restrict Content plugin has everything you need to get started with planning and building your money-making membership website. However, as your business matures, you may find yourself wanting some additional tools to help expedite the growth of your business.
The Restrict Content Pro plugin has you covered with additional core plugin tools and 34 Pro add-ons that will help you grow your business and reduce churn, including:
- Email Marketing – Build a sales funnel by integrating with your favorite email marketing tool.
- Content Tools – Currate your member’s experience and automate content restrictions with drip content and restriction timeouts.
- Extra Security – More tools to secure member accounts like reCAPTCHA and IP restrictions.
- More Integrations – Unlock additional 20+ integrations with payment gateways, billing tools, and other popular WordPress plugins.
Check out the comparison chart for Restrict Content vs. Restrict Content Pro.
Wrapping UP
You are just a few clicks away from launching your new membership site. Restrict Content Plugin from iThemes makes it easier than ever. All you need to do is download the plugin and fill in the blanks. Once you have the plugin in place, you simply build your content as you always have and then add in the level of restriction you want for that content.